
|

|
|
|
Bob's Searey LSX Web Site
|
Date: 9-6-2015
|
Number of Hours: 11.00
|
Manual Reference: Section 18G
|
Brief Description: Vertical Stabilizer - Fabric
|
|
I have been following the manual pretty much step by step, with the main difference being assembling much more of the airframe before inserting it into the FRP hull then a strict adherence to the manual allows. However, I did assemble and insert the Vertical Stabilizer into the Boom Tube in the order instructed. So here I be... its fabric covering has to be done in situ as opposed to lying flat on a work bench where it can be easily flipped around and otherwise manipulated for easy of application. It also means that the fabric has to be applied through, glued, cut, taped and brushed between the stabilizer bottom frame and the Boom Tube. This gap is narrower than a finger thickness. The manual does make mention of removing the Horizontal Stabilizer as an option at this point for fabric application. However, Steve and I looked at how the Trailing Edge of the Vertical Stabilizer protrudes down through the Boom Tube and becomes an integral part of the Tail Wheel mounting and said 'nada nada' to that.
After all that consternation, applying the fabric with the frame in place was a non-issue. In fact we agreed that it was actually easier than it would have been on the workbench. We could work on both sides at once, the 'crack' area was a cinch and the plane itself makes a large but useful jig.
The only hitch in this section was the size of fabric sheets specified in the manual. The first sheet in step 69.1 is 66"x52". We, and we are sure, you, cannot make this size of sheet fit the frame and "line up the clean edge of the Stits Fabric with the Leading Edge of the Vertical Stabilizer". It just barely fits in any orientation at all. See first photo below with how we did it... and note that our sheet is actually bigger than specified at 72"x52".
The second sheet is called up in step 71.1 as 72"x46" but we went with 72"x 53" to get it to fit. You can see that we took the extra step of applying 2" Linear Tape over the foam covered ribs on both sides of the Stabilizer.
|
|
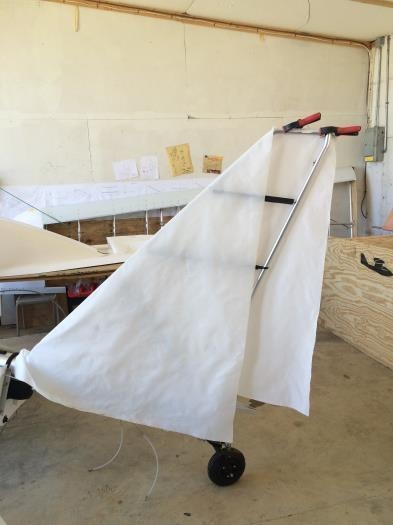
Draped with first fabric sheet
|
|
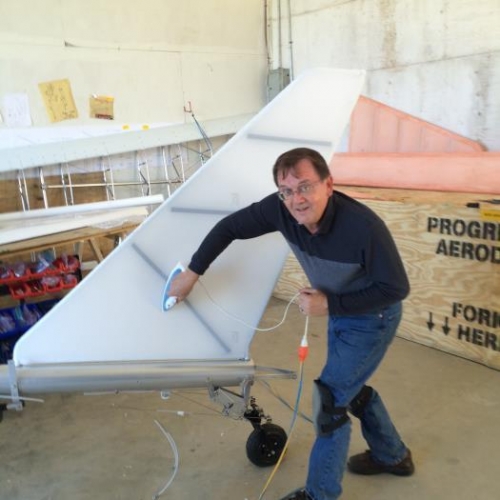
Ironing second fabric sheet
|
|
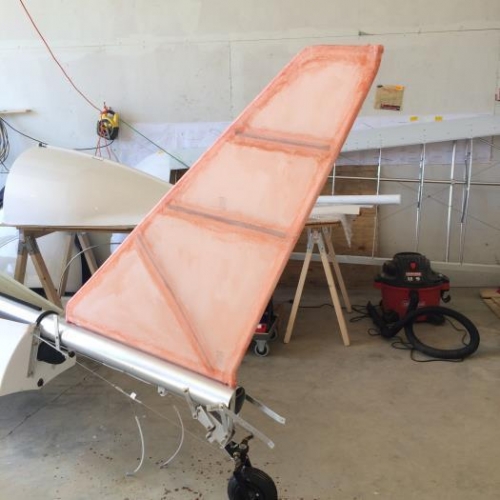
After brushing on first coat of Poly-Brush
|
|
|
|
|
|
|
|
|
Copyright © 2001-2024 Matronics. All Rights Reserved.
|