Brief Description: HS Polishing Touches and Countersinking of HS Spar
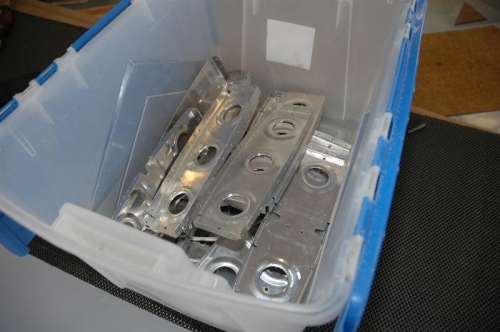
This evening I took ALL the HS ribs and gave them a last look to knock off the last remaining edges and any holes. I touched them up with a scotchbrite wheel.
They're all in a plastic box and ready to be cleaned and primed.
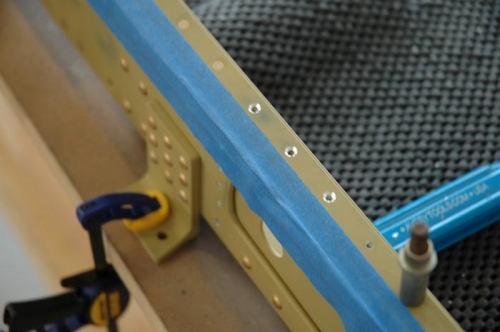
I completed the countersinking of #40 holes on the FWD spar. I'm competely done with it and plan on touching up the inside of the countersink with primer before riveting.
I noticed the shavings were falling between the douber and spar. I didn't want to fly around with shavings burried in between the two. So I used air to blow out the shaving and then taped the area between the Doubler and the Spar. No worries now.
I got started of the rear spar, but only did 10-15 holes. I'll get to them in the next session.
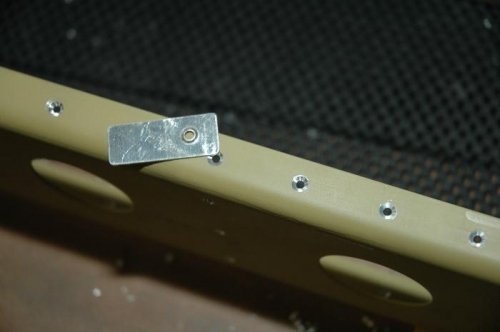
Finally I created a small dimple gauge with .025 Alumium (Matches the thickness of the HS Skin) to make sure the dimples will comfortably sit inside the countersink. I made them just deep enough that the dimple sits flat, but they aren't so big that they wobble (Or go all the way through the flange)
It was a good night in the shop.
Tomrorow, I'm going to be the guest speaker at EAA 12 and probably won't be able to finish anything on the plane. It's for a good cause though. :)
Cover the doubler/spar area with tape to prevent shavings from wedging in between.