
|

|
|
|
Paul's Zenith 601-XL
|
Date: 4-25-2007
|
Number of Hours: 6.00
|
Manual Reference:
|
Brief Description: Completed aileron trim tab assembly
|
|
Holy cow did this part take a whole lot longer than I thought! The trim tab assembly is tricky to get fitted just right. First off, this is the first part of the plane that had no assembly instructions, just the plans. I think Zenith figures that you have learned enough at this point that you should know how things go together. Nothing was difficult, but you sure didn't want to cut anything before you were 100% sure it was right.
Cutting the openings in the aileron skin and filing them to a finished size took a great deal of effort and time. After they were cut out, the aileron became very floppy so mounting the spar in the cutout for the trim tab was a real chore because you need 5 hands to keep everything in place and drill! I ended up solving the problem by attaching lengths of duct tape to the spar and using them like handles to pull it into place. I had pre-drilled the holes in the aileron skin, so I just had to pull until the rivet line I drew on the spar lined up in the holes. It is easiest if you drill the bottom skin to the spar first and then do the top since you have to sandwich the hinge between the skin on the top.
I mounted the hinge to the trim tab first and then to the aileron so I was sure the ailignment of the rear edge of the tab would match the edge of the aileron. I held the trim tab assembly in place with duct tape while drilling the hinge to the spar in the aileron.
After making the cutouts for the trim servo, mounting it and attaching the control arm to the tab, I disassembled both ailerons, deburred everything, drilled safety wire holes in the piano hinge, and primed all mating surfaces.
Tomorrow I will final rivet the ailerons and then move onto extending the workbench by 4 ft so I can begin the main wing assembly.
|
|
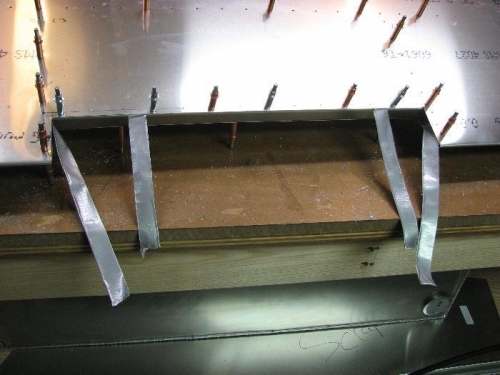
Installation trick used for holding the trim tab spar in place. Duct tape handles!
|
|
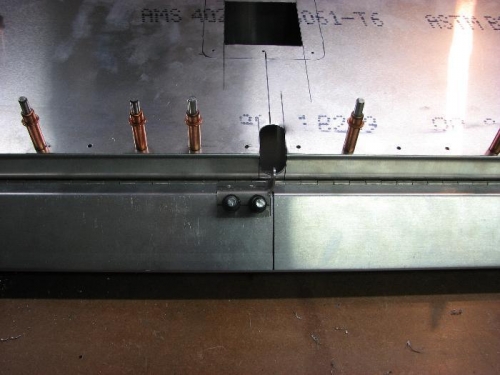
Bottom surface cutouts and control horn on hinged trim tab
|
|
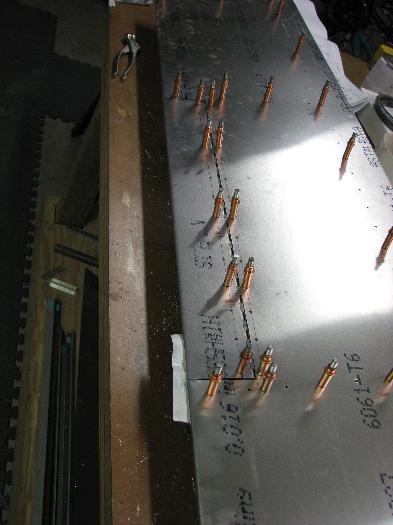
Completed trim tab installation on the left aileron
|
|
|
|
|
|
|
|
|
Copyright © 2001-2024 Matronics. All Rights Reserved.
|