
|

|
|
|
Kents RV-10 Construction Site
|
Date: 9-3-2007
|
Number of Hours: 1.00
|
Manual Reference: 7-11-1
|
Brief Description: Rudder Trailing Edge
|
|
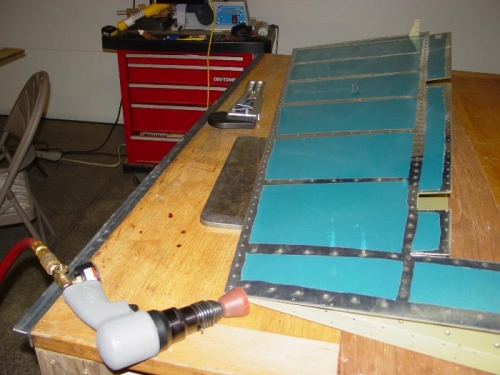
Riveted the rudder trailing edge. I admit to fretting over this, the instructions give you the feeling that this is the hardest thing yet encountered in the kit. I decided to modify the instructions slightly, and I think it worked out ok.
I started by hanging the trailing edge off the edge of my bench. I had attached a piece of angle iron to the edge to give a nice straight reference. I then filled all the rivet holes with rivets, and then used the squeezer to just get them started. I squeezed them enough so that they were well locked in place, but not enough that the squeezer touched the skin on the shop head side. As per the instructions, I did rivets 1, 11, 21 etc. till I reached the end, then went back and did 2, 12, 23 etc., then 3, 13, 23 etc. till all the rivets were started. I did check occasionally to make sure the edge was straight, but I could not see any tendency to bend doing this.
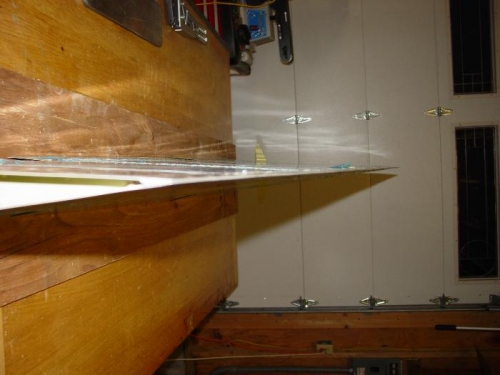
I then flipped the rudder over, and laid it on a piece of plywood that was close to the thickness of the back-riveting plate, as in picture 1. Using the mushroom set, I riveted in the same order as I squeezed. The back-riveting plate needs to be pushed in almost flush with the trailing edge so the mushroom set doesn't hit it since it hangs over the trailing edge when the rivet is finished. I worked slowly and kept checking the shop head till it was flush in the dimple.
Overall, this worked great and I will use this approach again. There were a couple minor waves in the edge that you could only see by sighting down the edge. I 'massaged' these a little and was able to pretty much remove them. The final result was better than I had hoped for when I started.
Pictures: DSC03495 - DSC03496
|
|
|
|
|
|
|
|
|
|
|
|
|
Copyright © 2001-2025 Matronics. All Rights Reserved.
|