
|

|
|
|
Mike & Aneta's RV Projects
|
Date: 10-12-2011
|
Number of Hours: 3.00
|
Manual Reference: R Section 7(11-12)
|
Brief Description: Completed the Rudder!
|
|
Tonight I rolled the leading edge of the rudder using 1 1/4" PVC tubing along with some 1" steel pipe. I found that the 1 1/4" PVC was a little too large of a diameter to get a decent roll on the aluminum, so I started the roll with the 1" pipe to get it started, then used the PVC to roll it the rest of the way. I took some doing to get it rolled, since I was working alone for most of it. I found it was difficult but possible, using vise grip pliers to rotate the pipe, while I pushed downward to keep the aluminum from lifting up. Make sure to use good gorilla tape. After a little trial and error, and just basically working slowly towards a good curvature, I was able to get the two piece close enough to squeeze them the rest of the way by hand. Once the clecos were in, I match drilled, deburred, then riveted them together with pop rivets.
The counterbalance weight at the top of the rudder was a challenge. I highly recommend using C-clamps to secure everything, otherwise it's difficult to get the holes to line up. Once this was done, and the screws were installed and tightened, the rudder was complete! Now it's on to the horizontal stabilizer.
|
|
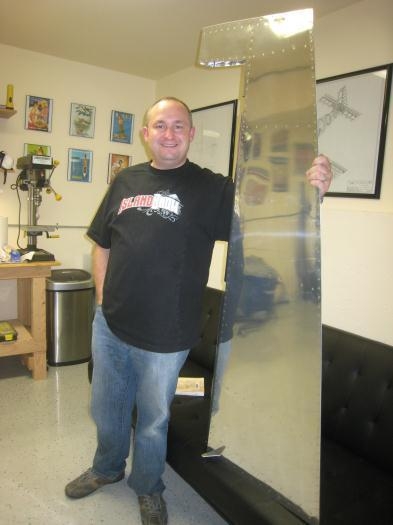
Straight as an arrow!
|
|
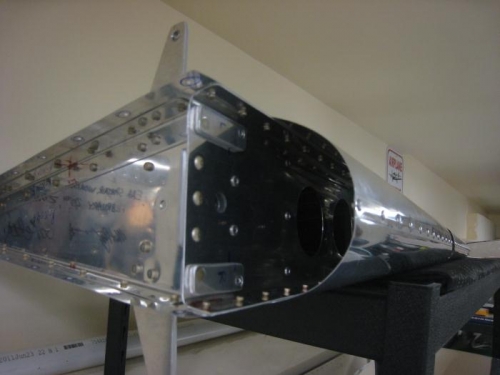
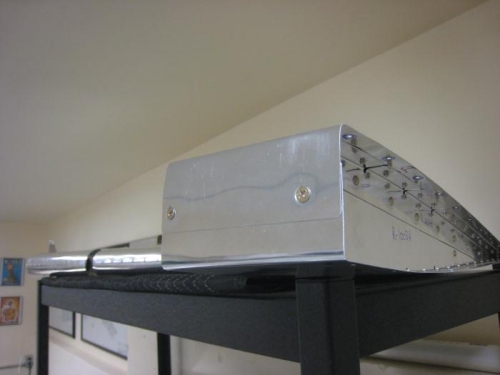
The rudder's leading edge.
|
|
The rudder's counterbalance weight.
|
|
|
|
|
|
|
|
|
Copyright © 2001-2024 Matronics. All Rights Reserved.
|