
|

|
|
|
Mike & Aneta's RV Projects
|
Date: 1-19-2020
|
Number of Hours: 5.00
|
Manual Reference:
|
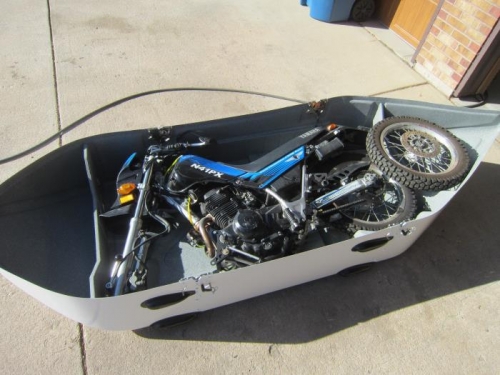
Brief Description: MotoPod Fabrication
|
|
Today, I was able to polish up the few rough spots in the paint on the MotoPod. The next step is to locate the cradles for the MotoCycle, so that I can install the hard attachment points for them in the fiberglass of the pod itself. Basically, they are female, threaded inserts that get drilled and epoxied into the fiberglass floor of the pod. In order to locate the cradle positions, you have to use the fit the MotoCycle into the pod. The cradles are formed such that the extremities of the MotoCycle forces them into place within the pod. From there, you simply use a permanent marker to outline the cradle positions. After you pull the bike back out, then you use the marked outlines to locate and match-drill for the cradle attach points. Once match-drilled, I hollowed out the attach point holes to fit the inserts. Then, I mixed up some epoxy and bonded them in place. Once everything is cured, you simply use thumb screws to install or remove the cradles for the MotoCycle. This way, if you're using the pod for skis or camping gear or luggage, you can leave the cradles at home. If you're bringing the bike, simply install the cradles then the bike.
|
|
The helmets go in the front storage bin area.
|
|
|
|
|
|
|
|
|
Copyright © 2001-2024 Matronics. All Rights Reserved.
|