
|

|
|
|
Michaels Web Site
|
Date: 7-14-2012
|
Number of Hours: 3.00
|
Manual Reference: P14
|
Brief Description: Battery Box
|
|
Continued with the battery box.
- With the engine mount in place, I located the battery box and marked it with a sharpie, including the first hole to be drilled, along the bottom flange of the box.
- With the engine mount removed, I drilled that first hole. The best way I have found to get through the stainless steel is:
- Use a hardened steel center punch with a few wacks of a hammer to set a small divot in the metal, at the center of the mark for the hole.
- Use a cobalt or titanium drill bit. I used a titanium one tonight.
- Chuck it down in the drill as far as it will go, to make the bit as short as possible.
- Be sure you have the point of the drill in the divot created earlier.
- Put a lot of pressure on the bit, then go REALLY, REALLY slow with the drill speed!! But be careful, if you put ANY side load on the drill bit it will break. They are strong, but brittle.
- Now I put the battery box on with a cleco in that single hole, leveled the box, then marked for the hole at the opposite end. Removed the box and drilled that.
- Cleco'd the box in place again then marked for the next holes; the ones between holes 1 and 2.
- Repeated the above process over and over until all the holes were drilled.
- I waited until I got all 3 flanges cleco'd before I made the cover strap, so I knew how long it really neede to be. Made the strap and set the first hinge on the box, then the one on the strap, and finally the ones on the fuselage.
|
|
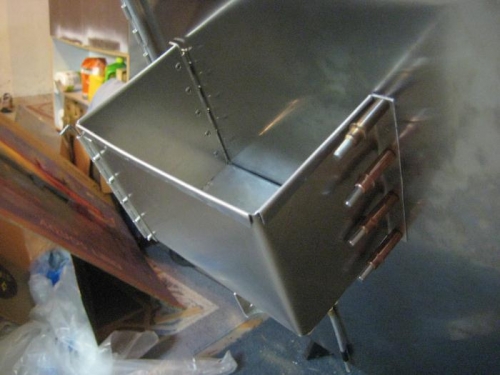
Installation in progress
|
|
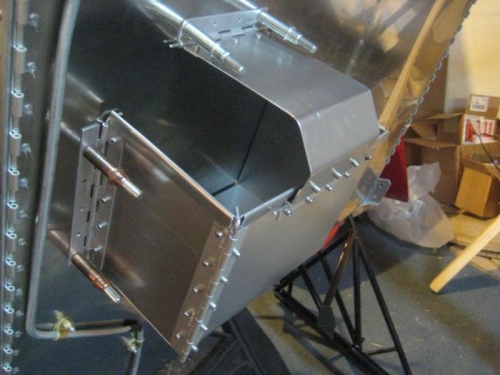
Side hinges are for removal so the battery can be taken out sideways.
|
|
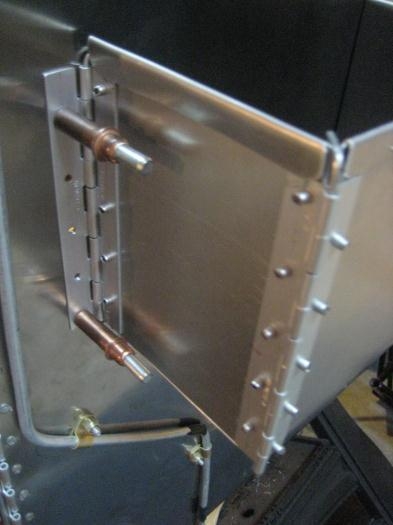
Closeup of the hinged corners.
|
|
|
|
|
|
|
|
|
Copyright © 2001-2024 Matronics. All Rights Reserved.
|