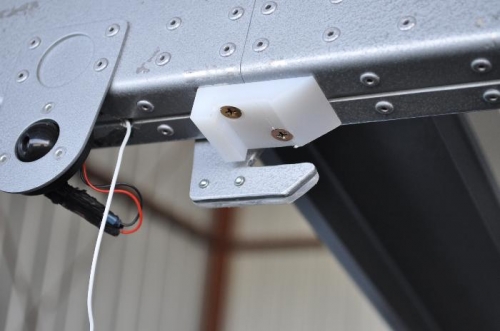
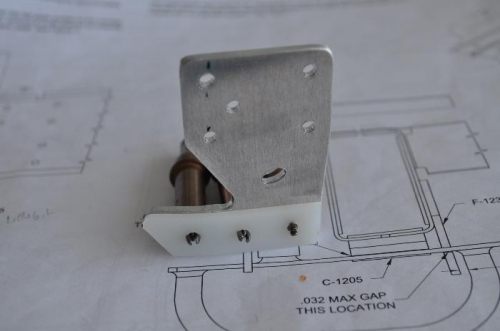
Continuing with the Canopy Latch Switch Retrofit. Removed the original C-1205 Latch Block. Prepped the replacement latch block (C-1205-1) by countersinking the 2 holes and final-drilling the holes to #19. Installed the latch block on the roll bar. Removed the F-1231F Latch Plate. Clecoed the replacement plate (F-1231F-1) to the same positiion and match-drilled the switch mounting hole to #43. Removed the Latch Plate and final-drilled the #43 holes to #30. The next step is to tap the switch mounthing hole to #4-40. I could not find this size tap in my tool drawer. I'll have to order it - another delay. Continued with the other steps that I can do. Curved the arm of the Latch Plate forward. Fabricated the WH-W1115 Canopy Latch Switch Ground Wire by crimping a ring terminal to one and and a female spade connector to the other end. Drilled a #19 hole into the F-1232A Roll Bar Brace for the ground wire/terminal and removed the paint around th hole. Fabricated the C-1214 Latch Block by match-drilling three #30 holes and trimming it to match the shape of the Latch Plate arm. Will complete it later.