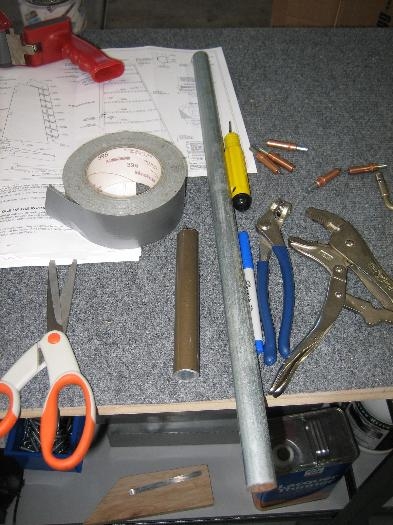
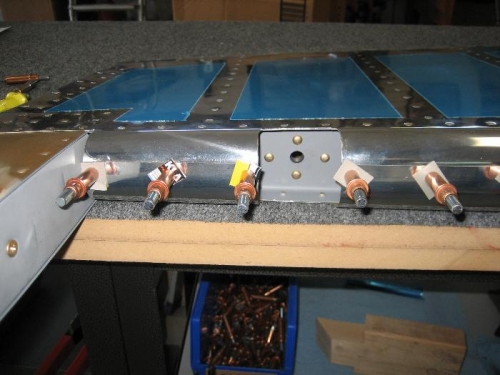
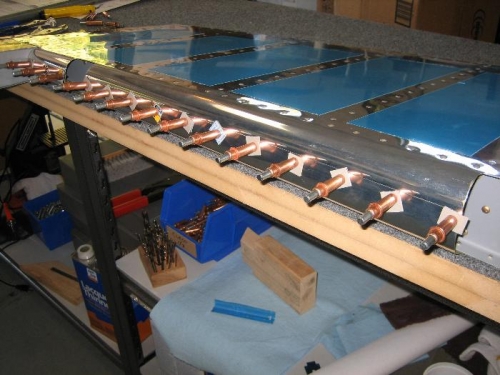
Referencing the manual and other builder web sights, I decided to use 3/4" galvanized pipe and duct tape to form the leading edge curved radius. I cut the pipe so that I could form the two lower sections separately. I used a short piece of pipe to form the top section of the rudder first. I layed the rudder on a carpeted work surface and taped the short pipe to the flanged rudder skin length wise. With vise grips secured about the pipe, I slowly started to twist the pipe keeping downward pressure on the skin so it hugged the work surface as I twisted. I had to reposition the vise grips to give me more rotation after the initial turn. I worked down the rudder with the longer pipe until I had the other two sections formed. Next I had to flip the rudder over and start the process all over for the non-flanged side of the skin. That proved more difficult, because the previous formed skin would get in the way of the new formed skin. I had to pull the formed skin up out of the way. A second set of hands would have really helped in this process. The hardest part was aligning the holes after forming so that I could insert clecoes. I had to start at one end and squeeze the formed skins together with one hand and insert a cleco with the other. That process took all my strength to accomplish. Looking length wise down the leading edge, I had to use alittle muscle to fine tune the formed edge so the radius was consistant. Next chance I have will be the blind rivets.