Brief Description: Install GAP 26 Pitot/AOA Probe.
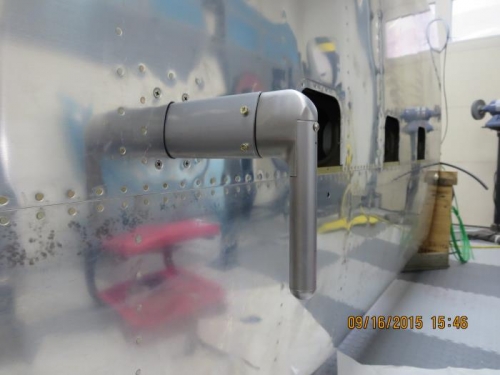
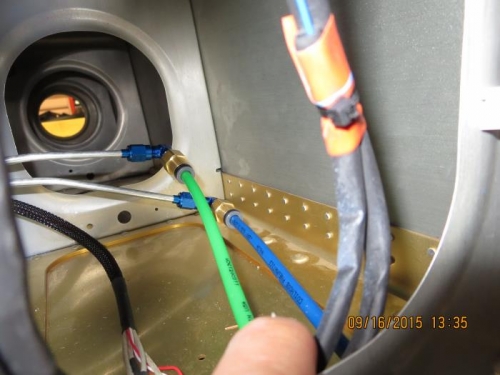
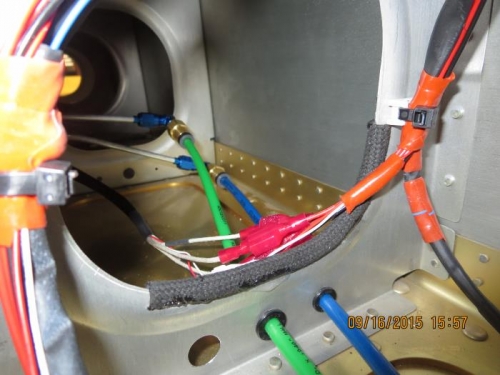
I finished riveting the last outboard rib to the bottom wing skin and also riveted the wing skin to the flap hinge and aft spar. Now to install the Garmin GAP 26 pitot/AOA probe, I first installed the probe mast wirh four #8 stainless steel screws to the mast mounting plate that I had riveted with the wing skin. I took 2 AN822-3D elbows and two female plastic tubing quick connect fittings from my SafeAir1 pitot/static installation kit. I applied sealant to the threads of the AN elbows and threaded the female connectors and torqued. I inserted the pitot probe with the wire harness into the mast and secured with 4 screws. I had to reach through the access cover hole in the wing to thread the AN elbows to the pitot and AOA tubes AN nuts and tighten. I pushed the pitot and AOA tubes into the connectors. I then pulled the harness through the rib lightening hole and connected the 5 wire connectors to the control box as shown on page 4-4 in the Garmin G3X installation manual. I took a piece of fabric covered vacuum tubing and sliced it length wise to slip over the edge of the rib lightening hole to protect the wire harness from chaffing. I secured the vacuum tube with adhesive to the rib. I wrapped the pitot/AOA tubes with protective tape and tie wrapped them to the Click-N-Bond mount I had installed earlier. I also wrapped the wire harness with protective tape and tie wrapped to secure the harness.