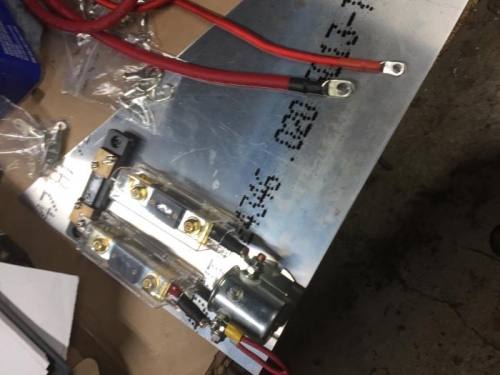
Brief Description: Amp Meter Shunt Installed & Design Issues
Worked on the configuration of the solenoid, fuses, and shunt. Formed the lug on the left side fuse to fit to the load connection on the shunt. Built up the cable for the right side fuse by mounting the lug to the end of a 2 inch segment of 4 gage cable. Placed a 1 inch segment of heat-shrink over the terminal and shrunk it to fit. Trimmed back 1/4 inch of the insulator on the other end of the cable segment and applied solder paste. Mounted the lug end of this cable in a vice and applied a soldering iron to melt solder into the end to hold the filaments together. Left the segment to cool.
Applied terminals to the 4 and 8 gage cables by mounting a 1 inch segment of heat-shrink on each cable and then mounted the terminals by removing 1/2 inch of the insulation, installing the appropriate terminal and then squeezing the terminal on the end of each cable with a compression tool. The heat-shrink tubing was then moved in place over each terminal and heat applied to fix it in place on the terminal.
The short segment of 4 gage cable was installed in the end of the fuse holder and connected to the right side of the solenoid. This fuse provides power to the main electrical buss.
Several configurations of layouts were evaluated to find a configuration which would fit the space available and provide a minimum amount of wiring. More work to be done here.