Brief Description: Fitting Side Panels Radio Controls and Oil Filler
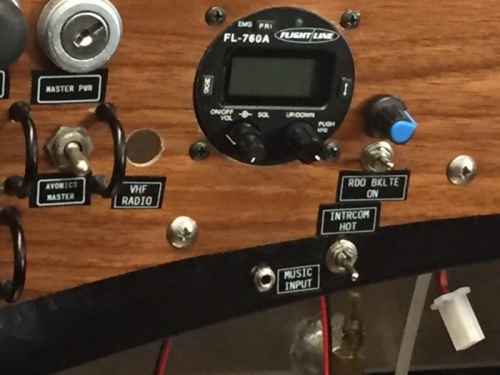
Drilled the anchor holes in the instrument panel for the rheostat and switch for the backlight controls. Mounted the SPST switch so that it points to the rheostat with it is active. Mounted the rheostat and applied lock-tight to it and the switch. Tighten both securely and installed the rheostat knob. Made and applied labels for the backlight and intercom switches, the music input and the vhf radio circuit breaker. Drilled two holes on the left and right sides of the instrument panel bottom flange for the installation of the audio and MIC jacks.
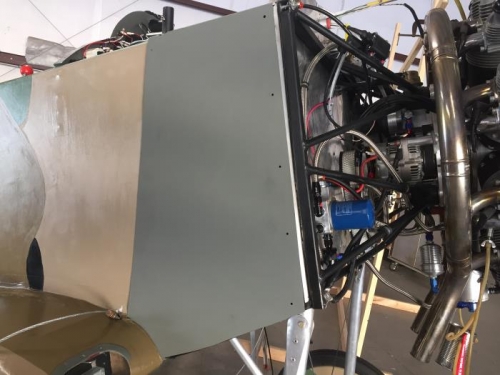
Cut the fabric on the inside of each of the wing stub nose and glued it back under the nose cone and around the longeron. Also cut the fabric on the top inside of the right wing stub at the nose. On the right side used the Dremel tool to cut away about a 1/4 inch strip on the top inside of the nose piece. Fitted the right side in place and checked the alignment with the mounting screws. Repeated the process for the left side without having to trim any material from the nose cone.
Placed the instrument panel cover on the forward fuselage and marked the possible location for the installation of the oil filler. Removed the oil filler from the top of the oil tank. Measured the diameter of the filler can which came in at 3 inches. The cutting of the opening will have to wait for another work day.