Brief Description: Continued Prep on Upper Left Wing for Covering
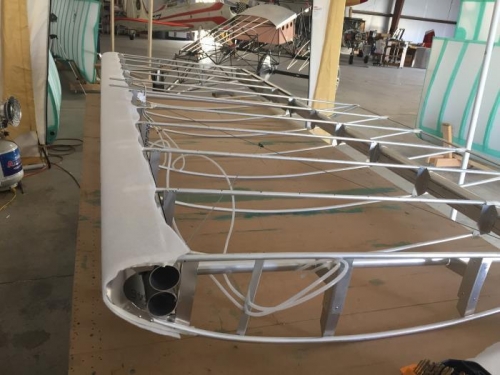
Drilled each of the marked locations on the bottom of the upper left wing with a 1/8 inch drill. Deburred each of the stitch holes. Applied cloth tape to the rivets, edges and overlaps on the bottom of the wing. Removed the wing from the table and set it on edge next to the table. Swept the table of the shaving left from drilling the stitch holes. Placed the wing back on the table with the top up. Using the bending block formed the top edge of the leading edge down to provide a transition to the top ribs. Sprayed the leading edge with contact cement. Laid the felt material along the leading edge aligning the top edges and smoothing the material down. Turned the wing over and sprayed the bottom half of the leading edge with contact cement. Pulled the felt tight across the leading edge and smooth the material in place again aligning the edges of the material and the bottom edge of the leading edge. Mounted a 3/4 inch angle by 6 inches to the end rib of the wing about 9 inches from the leading edge. Drilled two 1/4 inch holes in the angle and deburred each hole. Installed each of the pitot tubes through the holes to hold the tubes in place at the end of the wing.