
|

|
|
|
Kupe's Zodiac 650B
|
Date: 2-8-2013
|
Number of Hours: 2.00
|
Manual Reference: 6-T-3A
|
Brief Description: Attach Elevator to Stabilizer
|
|
Today I linked the elevator and the stabilizer together with the big, long piano hinge. I started off by re-cleco fastening the forward side of the elevator internally so the rib clecos wouldn't interfere with the process. Then I cleco fastened the aft tip ribs and installed the fiberglass tail tip (white in the pictures) which I professionally locked in with duct tape. Then, with the hinge cleco fastened to the stabilizer, I lined up the elevator between the 2 aft tip ribs and slid it forward until I could work the back half of the piano hinge up under the top skin of the elevator.
Once in place, it was a matter of centering the elevator precisely between the 2 tip ribs (5 mm total space to work with!) and ensuring the elevator was flush against the spline of the hinge. With the tip ribs ~8 feet apart, I probably walked a few hundred yards going back and forth, measuring and remeasuring, to make sure the elevator was precisely centered. I eventually honed in on it close enough to use duct tape to freeze the position. After several final checks, I marked the hinge through the pilot holes on the elevator, removed the hinge, drilled the marks, and reinstalled the hinge using clecos. Looks like that 5mm space was enough!
|
|
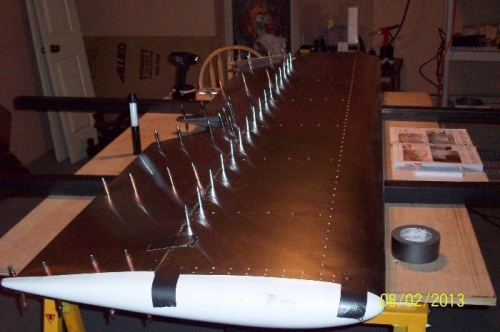
Fiberglass tail tips and tip ribs in place. Elevator is pushed forward onto the hinge.
|
|
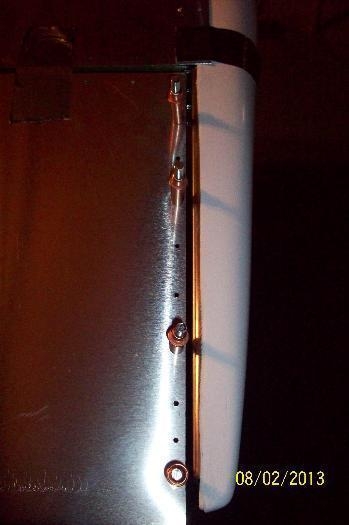
Looks like this on both ends - not a lot of room to play in there.
|
|
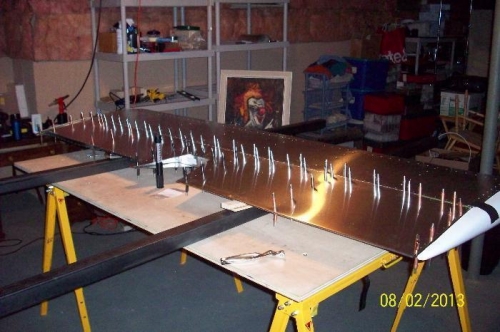
The stabilizer and elevator as one piece.
|
|
|
|
|
|
|
|
|
Copyright © 2001-2024 Matronics. All Rights Reserved.
|