
|

|
|
|
ALAN'S WEB SITE
|
Date: 9-24-2009
|
Number of Hours: 5.00
|
Manual Reference: DWG-48
|
Brief Description: Canopy Skirt - Latch Lug
|
|
This morning I went flying and as I pulled up to the hangar, there was Ken. Ken is the A&P who has been inspecting my building job.
He came at a perfect time. Yesterday, I had broken off a tap in the roll bar. It broke off flush with the top. I pondered on how the heck to get it out yesterday... and finally gave up. Ken took one look at it and had a few ideas. He thought he had a broken tap remover back at his house... so headed home to look for it. He returned later without the tool... he couldn't find it. But, instead had a few tiny metal bars. He ground them down and slid them into the groove in the tap between the tap and the side of the hole. Using a pair of plyers, he twisted the tap out. (THE GUY IS AMAZING!!)
I worked on the left canopy skirt. Drilling the holes, countersinking, dimpling, and de-burring. I attached it to the canopy and back-drilled the holes for the canopy.
I actually finally drilled the canopy for the front bearings. (I lost them and had to reorder more.) I drilled the holes out using progressively larger bits. (1/64th at a time) When I got within a 64th, I used a reamer for the final hole. Then I used the squeezer to slide the bearing in. I was worried one would tilt over and screw up the hole. But, the both slid in perfectly. They are nice an tight.
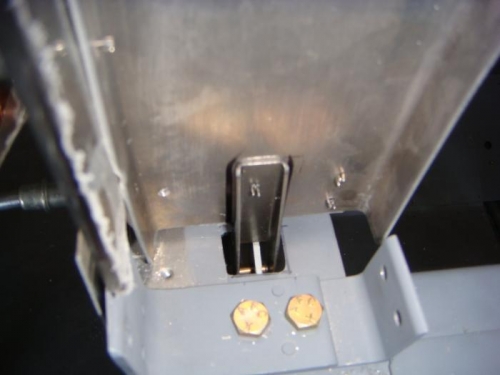
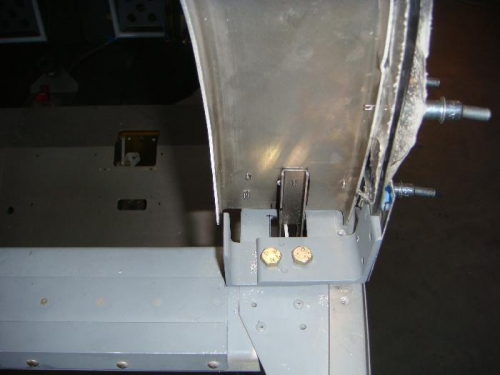
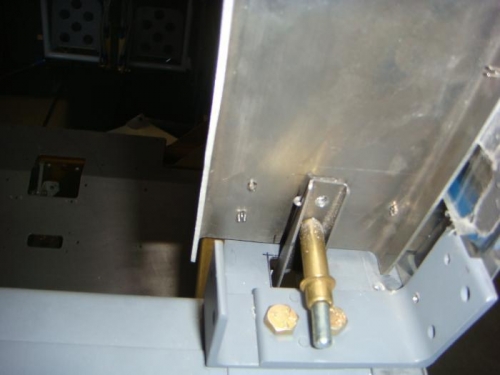
This evening I snuck into the hangar for a few more hours and worked on the canopy latch lug. This is another job I have been doing a great deal of thinking about. When the canopy and roll bar are down and in place, it's almost impossible to see where the lug goes and hold it in place.
I ended up using double stick tape to hold it in place. I put double stick tape on the lug, closed the canopy and the latch. Pulled the lug up until it was in contact with the latch and pushed the lug into place with a skinny screw driver. I then raised the canopy and checked it out. The lugs needed a little adjusting, but with a few trials, I think they are in place now.
I've put in quite a day, so I'm goi
|
|
|
|
|
|
|
|
|
|
|
|
|
|
|
Copyright © 2001-2024 Matronics. All Rights Reserved.
|