I have been putting this off for a few weeks, replacing the horizontal stabilizer attach angles. Ken didn't like the rivets I had attached them with. I had riveted them on back when I was really a rookie at riveting. (Not that I'm much better now:-)
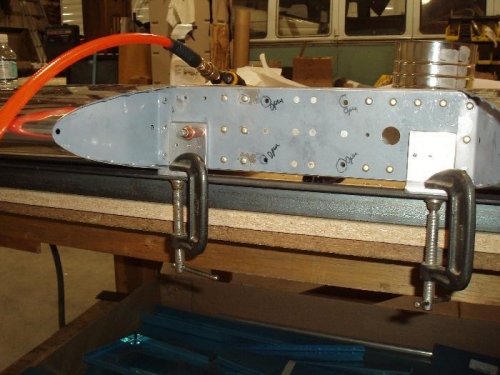
I drilled out the rest of the rivets. Both in the attach angle and others in the horizontal stabilizer Ken had marked with a felt pen. (About 10 rivets total)
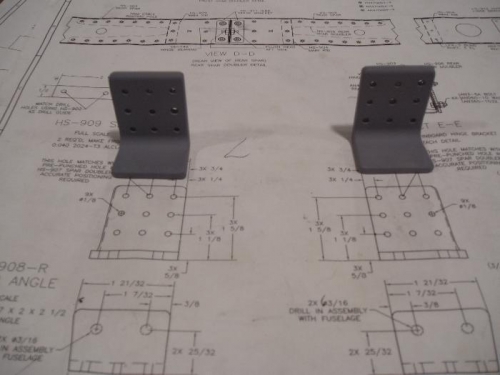
I re-fabricated the attach angles and spent about 30 minutes trying to figure out how to get the holes to match exactly to the other attach angle I had removed. I finally came up with an idea that worked amazingly well. I layed the old attach angles on a copy machine and zapped a copy. I cut out the pattern, taped in on the back of the new attach angles and drilled the holes with the drill press using the pattern. When I clecoed it in place it fit perfectly.
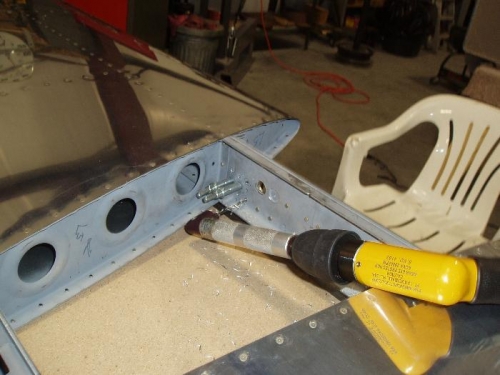
I then drilled the holes to size from the back using an angle drill. I'm happy with the result. I drilled 4 of the holes for a #5 rivet because a #4 was a bit wobbly. (AND... because Ken said I should.)
After deburring, I primed the pieces and sat them aside.