I finally buiilt up the nerve to start work on the camlocs. I was so worried about drilling 50 large holes in the cowling and goofing up all of my work. I actually checked the price of a new cowling and said to heck with it. Like most of my concerns, it turned out to be nothing. In fact, installing the camlocs have been fun... so far.
I followed the hybrid plan of the way the direction said to do them and a few ways I found on the internet.
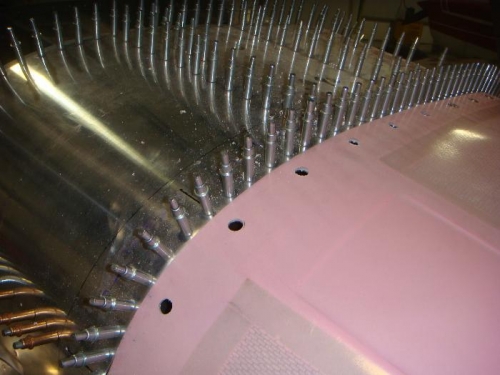
The cowling supports and cowling were drilled an clecoed. So, first, I used the template that came with the camlocs to drill the two holes where the rivets will go. (One on each side of the center hole.) Then, I put the cowling on and clecoed a washed on the size of the final cowling hole. (1.2 inch) I used a step drill to carefully enlarge the hole. (Having the 1/2 hole drawn on the cowling helps you keep the hole centered. A step drill can walk on you.)
After I had drilled about 10 1/2 holes, I took the canopy and the support off. I enlarged the 1/2 hole in the support to 5/8 inch. Then I countersunk the holes for the rivets and riveted the camloc locking device in place.
The first time I put the cowling on, I had a scare. I turned the camlocs into place, but couldn't get them off without unscrewing the middle unit. (It was operator error.)
I decided to stop after finishing the left top side.