
|

|
|
|
Jeff & Jackie's RV-8 Project
|
Date: 12-30-2006
|
Number of Hours: 0.75
|
Manual Reference: 7-12
|
Brief Description: Left flap installation
|
|
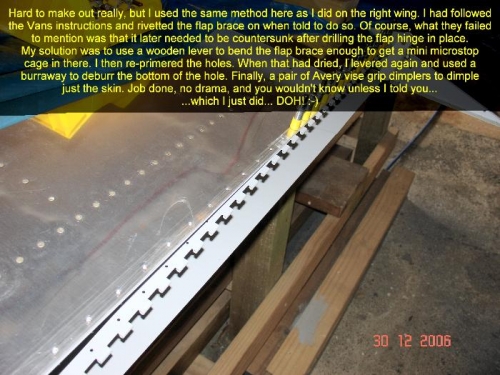
I used the same method here as I did on the right wing. I had followed the Vans instructions and rivetted the flap brace on when told to do so in the manual. Of course, what they failed to mention was that it later needed to be countersunk after drilling the flap hinge in place, and then the skin gets dimled and sits in the countersink. This allows the hinge to be left 'au naturel'. At one stage I was toying with attempting to dimple the hinge, but was warned off by other builders. My solution was to use a wooden lever to bend the flap brace enough to get a mini microstop cage in there and countersink the holes which I then re-primered. When the primer had dried, I levered again and used a burraway to deburr the bottom of the hole; I didn't want to dimple any burrs left over from drilling but couldn't access the back of the hole any other way. Finally, a pair of Avery vise grip dimplers to dimple just the skin. Job done, no drama, and you wouldn't know unless I told you... ...which I just did... DOH! :-) Point of interest: Kitlog only allows three photos per log entry, so I don't get to show all of them and have to pick the 'best' ones. I always try to add some explanatory text to all my photos (as much for me as for you). I now have 480 photos of the wing construction, and my 'photos' folder is up to 580MB. And we haven't even received the fuselage kit yet, not to mention the interior, panel, engine, finishing, etc, etc. Wow!! :-)
|
|
Left flap hinge being cleco'd
|
|
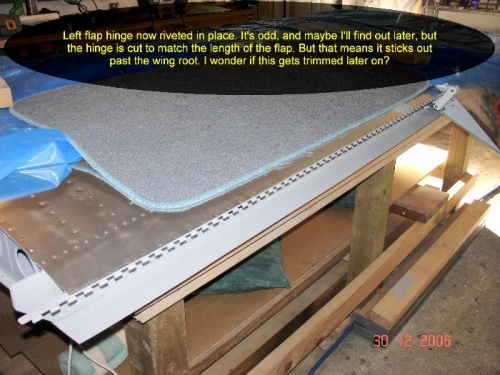
Left flap hinge riveted
|
|
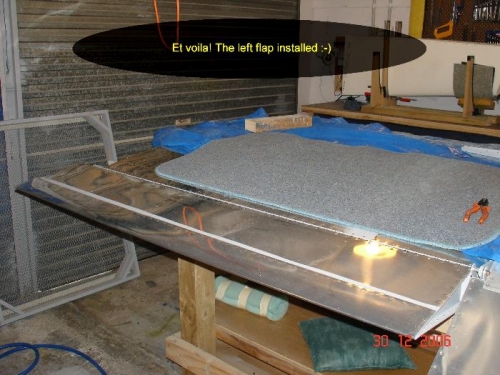
Left flap installed
|
|
|
|
|
|
|
|
|
Copyright © 2001-2024 Matronics. All Rights Reserved.
|