
|

|
|
|
Jeff & Jackie's RV-8 Project
|
Date: 12-18-2006
|
Number of Hours: 3.00
|
Manual Reference: n/a
|
Brief Description: Right wing tip (lens)
|
|
Wow, that took longer than expected :-) Still, I did differ from the plans slightly. First of all, cut the supplied lens into two equal halves along the moulding dimples. Don't worry, you have to trim *loads* off later! Next up, get the correct half for which ever wing you are doing, and tape it in place over the wing tip. Now mark to within, say, a 1/4" of the recess and mark a line. Remove the lens and trim. Re-fit the lens to the wing, mark it closer and trim again. And again, and again. As you get real close swap to a file, and the a smaller file and then some emery cloth. Finally, when it fits and is ready for drilling, dress the edges and snad everything smooth. Next up drilling for the screws and nutplates. This is where I differed, in so much as I decided to not only use #4 nutplates and AN509-4 stainless steel screws rather than the #6 called for in the plans, but I also wanted three on each side. Don't ask me why, I know just about every other building went as per the plans and it all worked out, but this is my plane and this is how I wanted to do it. Besides, I've got all those #4 nutplates and screws from the Cleaveland Tool RV wing tip kit which I am not using (having decided to go with #6 screws to hold the wing tips on instead). Anyway, I drilled for the #4 and then had to work out how to actually fit the nutplates. I decided pop rivets were the way to go, since I didn't want to hammer on the fibreglass with a rivet gun. I tried MK-319-BS but the grip length was too short. The only other rivets I had suitable were AA-CQ-4-L but these required a larger hole than the #40 for the solid -3 rivets that are usually used to hold nutplates. I trialled a #4 nutplate with the holes drilled out to 1/8" and it seemed just fine, so that is the way I went. The only thing I did was countersink the fibreglass fo r the rivets, and then once set I used a pin punch to knock out the mandrel, since it sat proud on some of the pulled rivets and would have been awkward to sand off. And there you have it.
|
|
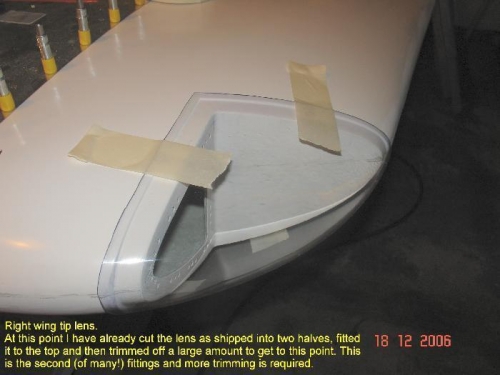
Trimming the lens
|
|
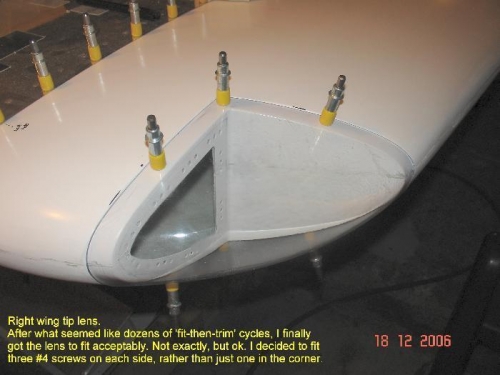
Drilled for three screws top & bottom
|
|
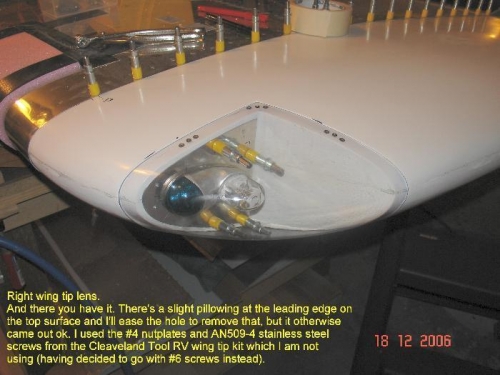
Fitted with #4 screws and nutplates
|
|
|
|
|
|
|
|
|
Copyright © 2001-2024 Matronics. All Rights Reserved.
|