
|

|
|
|
Jeff & Jackie's RV-8 Project
|
Date: 8-16-2006
|
Number of Hours: 2.00
|
Manual Reference:
|
Brief Description: AoA install, fuel tank SB 06-2-23
|
|
Have done some good work tonight. I have fitted the Angle-of-Attack pressure ports and the guide tube. Everything is fully prosealed and screwed into place and can now be left to set up. As promised, there's a picture below of the way I have done it. One of Jackie's friends, Carl (thanks mate!), made the little plastic guide at the bottom to match the same dimensions as the upper port supplied by AFS. A short length of clear vinyl tubing completes the deal. If you want more details then email me directly and I'll send you a load of photos and notes. I couldn't get the exact same screw locally for my guide, so I have used M3 ST-ST CSK screws instead.At the same time, since I was prosealing stuff, I removed the flop tube from the right wing fuel tank and safety wired as per the service bulletin (SB06-2-23). I also (per instructions) removed the brass weight and then prosealed the threads before re-installing it. I hve yet to 'punch'-safety the nut/collar, but will do that once the proseal sets up.Oh, and there's a picture of my new drill press as well. The chuck on the old one broke, and it was almost as expensive to replace the chuck as it was to buy a new drill complete. Except I went for the next model up, so it cost a little more. And I need to buy a pin chuck now too, since the new dril won't hold anything less than about a #30. No matter, I'm still well pleased with it; its a better quality drill, much quieter!!
|
|
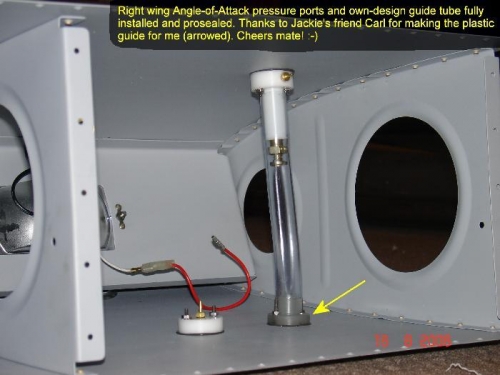
Angle-of-Attack ports installed
|
|
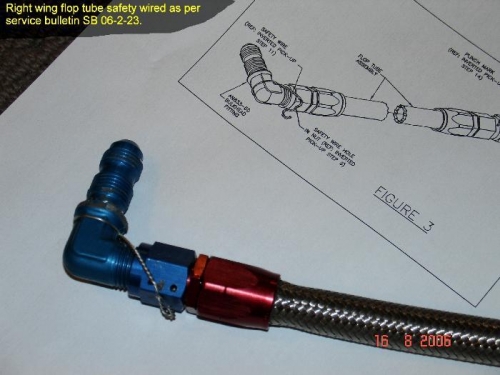
Flop tube safety wired (right wing)
|
|
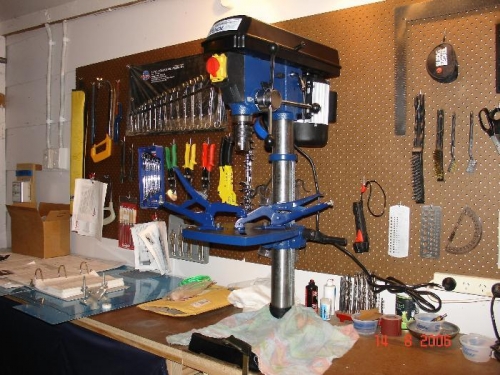
My new drill press!!
|
|
|
|
|
|
|
|
|
Copyright © 2001-2024 Matronics. All Rights Reserved.
|