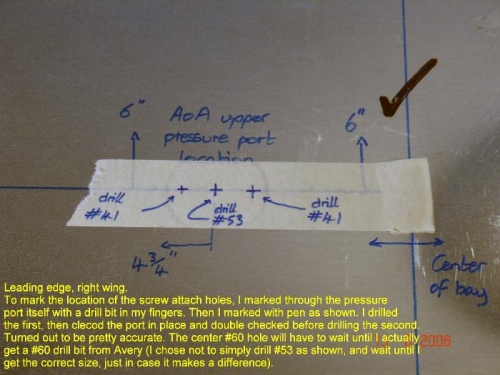
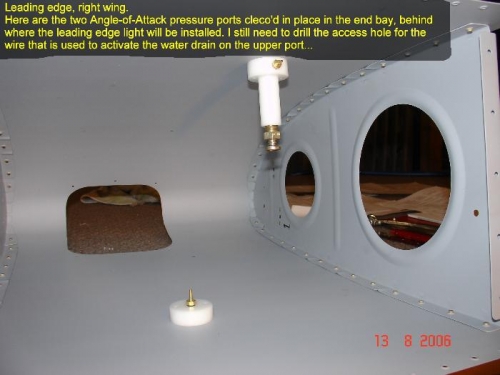
Had quite a productive day today. As you can guess, weather was bad; no skydiving. Seems to be a common theme at the moment. Rumours say the bad weather will continue well into September: jsut great. Ah well. Today I got the Angle-of-Attack ports fitted, and completed the leading edge light installation (using the same method as for the left wing).To mark the location of the screw attach holes on th eAoA pressure ports, I marked through the pressure ports themselves with a drill bit in my fingers. Then I marked with pen as shown. I drilled the first, then clecod the port in place and double checked before drilling the second. Turned out to be pretty accurate. The center #60 hole will have to wait until I actually get a #60 drill bit from Avery (I chose not to simply drill #53 as shown, and wait until I get the correct size, just in case it makes a difference). The water drain on the upper port gets actuated with a piece of wire inserted into a hole that has to be drilled into the bottom skin. To find out where to put the hole I simply taped a 6" rule to the upper port and marked off where it touched the bottom skin. To make things easy in the future, I'm going to get a piece of plastic turned up to match the same diameter dimentions as the upper port and fix it to the bottom skin in the same way. Then I will run a piece of large diameter tube between the two that will act as a guide for the wire. If you're not sure what I'm getting at, wait a while and when I finish it off I'll post a new log entry with pictures.