I prepped the flaps by cleaning all surfaces that will be glued. I covered the fabric plates and edges of the leading and trailing edges with anti-chafe tape. I measured and marked glue lines for the fabric overlap on the leading edges. Stewart’s calls for a 2 inch overlap, I used about 3 inches. I applied glue to that overlap area and allowed the glue to dry. I measured and trimmed the fabric.
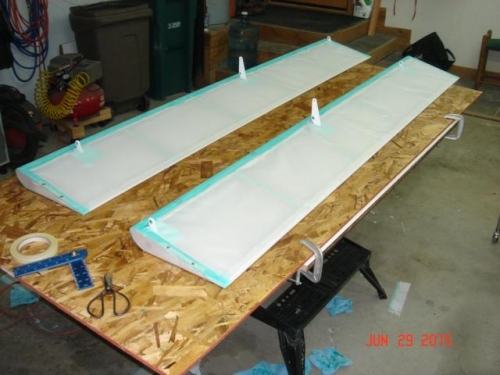
I covered the end ribs first. Since I’m going to be gluing into the fabric that covers the end I let that glue set up overnight before covering the surface. I used the wrap method, one piece of fabric wrapped around the flap with an overlap glued on the leading edge. No glue on the trailing edge. After attaching the fabric to the leading edge I applied another coat of glue to the overlap area and allowed it to dry. Then I wrapped the fabric around the airfoil and set it into the dried glue. I applied another finish coat of glue to the overlap area.
I trimmed the fabric even with the end ribs. I applied reinforcing tape over the rivet holes on the end ribs. I installed fabric rivets in the end ribs to help secure the fabric when I shrink it.