
|

|
|
|
Jerrys Web Site
|
Date: 12-30-2013
|
Number of Hours: 8.00
|
Manual Reference:
|
Brief Description: Right Wing Final Steps
|
|
Today, I started by installing the fuel tank resistance sender. That included drilling a 1 1/5 inch hole in the root rib, installing the sender, then marking/drilling the mounting holes. I used nut plates on this one, the previous one I used AN-3 bolts/nuts. We'll see which wing works better. In any case, I assumed I would have to pop the inspection cover to do any repair work or to replace a sender. Next, I worked on the torque tube where the aileron push pull tube connects. The plans did not have this bolt saftied, and it was a necessary after fix. The photo below shows what I did. I replaced the bolt with a drilled head, then put the clamp around the torque tube and fashioned a bracket to safety the bolt. This was an idea put forth by the manufacturer. Now consider, all this was done through a 3 1/2 inch hole -- ugh. Pulling the clamp tight enough to get the bolt through it was the hard part. I used various things, including safety wire, tie wraps, a scratch awl to center the holes, and a small needle nose vise grip. It took a very long time and my arms are badly scratched. Next, I drilled and installed rivnuts for the access plates on the three smaller access covers on the lower trailing edge.
|
|
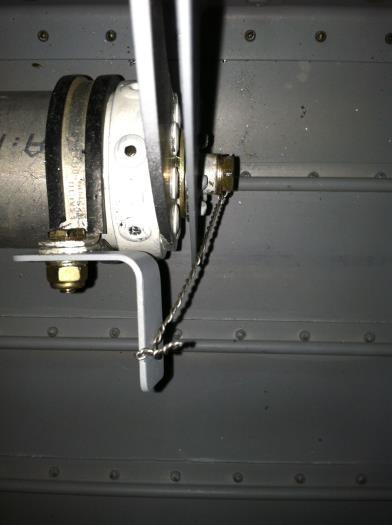
After Market Safety Wire
|
|
|
|
|
|
|
|
|
Copyright © 2001-2024 Matronics. All Rights Reserved.
|