
|

|
|
|
Jerrys Web Site
|
Date: 11-25-2013
|
Number of Hours: 6.50
|
Manual Reference:
|
Brief Description: Aileron Spade Install
|
|
Today, I worked on the right aileron spade. This skin is not predrilled, so it was necessary to attach it, drill, similar to the wing ribs, lay out pilot holes, then align on ribs and drill. After clean up and priming, I then riveted the bottom of the skin per the plans, then slid the preformed counterweight into the tip. Unfortunately, the rivet tails of the two leading bottom rib rivets didn't allow it to sit in place. So, I drilled out the rivets, slid the weight in, market the rivet holes, took it back out and drilled into the weight. I needed to do the same on the top of the weight as it fit tightly into the leading edge of the ribs, side to side. So, the rivets are basically inserted into the weight (not all the way through), and then pulled, expanding in the weight. Nervous about this, I went ahead and coated the weight in proseal before final riveting. The three rivets on the bottom are 3/16 to hold the weight in place.
All this took quite a bit of time, the next one should go more quickly. Then, I spent some time, drilling the pitot tube into place. I'm using the Murphy pitot tube, non-heated, and affixed it to the outside of the wing, in case I ever want to change it out.
|
|
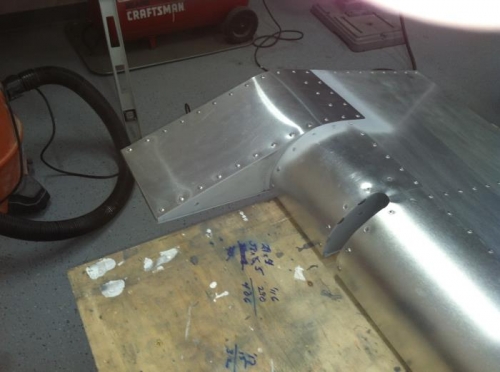
Completed Spade
|
|
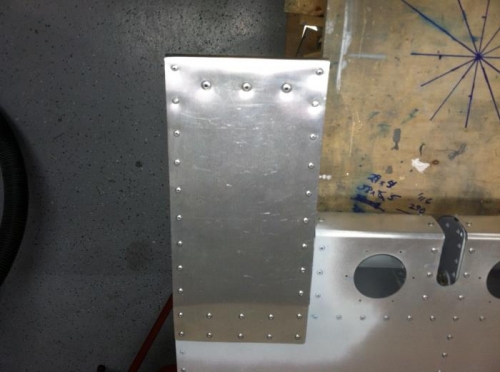
Rivets holding Counterweight
|
|
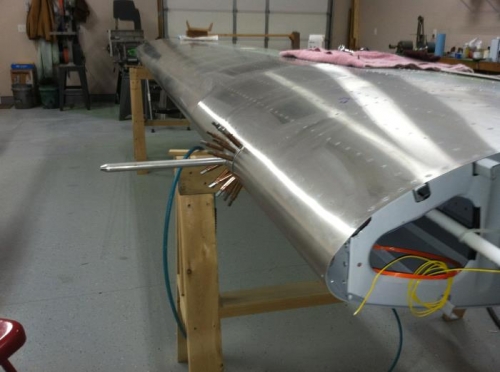
Pitot Tube Install
|
|
|
|
|
|
|
|
|
Copyright © 2001-2024 Matronics. All Rights Reserved.
|