Brief Description: Completed seat backs and started fuel tank mount
Completed step 8 page 25iS/U-04 for both seatbacks Step 8: Bolted the F-00120-R an F-00121-L to the lower corners of the Seatback Assembly using the hardware called out.
Completed steps 2-3 page 25iS/U-05 for both seats Step 2: Attached the Seatback Brace Assembly to the aft side of the Seatback Assembly by inserting the hinge pin through both halves of the F-1237F as shown in Figure 1. Step 3: Secured the bent end of the hinge pin using safety wire as shown in the detail view in Figure 1.
Completed steps 1-3 page 25iS/U-06 Step 1: Inserted the F-00098 partially through the F-00120-R, slid on the SPRING-00004 and washer, then inserted the F-00098 completely through the F-00120-R.
Step 2: Compressed the spring with the washer, then secured the F-00098 with the cotter pin called out in Figure 2. Step 3: Installed the Left and Right Seatback Assemblies as shown on Page 25iS/U-01.
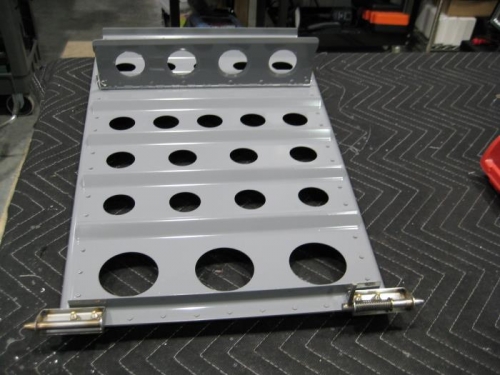
Completed steps 5-6 page 26iS/U-08 fuel tank bottom mount Step 5: Temporarily screwed the F-01229A and F-01229-1 to the baggage floor in the four places shown in Figure 2. I hsd to install the tank first as the rib structure on the bottom of the tank would not clear the front edge of the F-01229A and F-01229-1. Step 6: Using the hardware called out in Figure 2, bolted the fuel tank to the fuselage at the top two attachment points, and insert clecos in the aft four holes in the F-01229A. My tank installation (using a factory built tanl assembly is a tight fit at the mount and there is no room to install the washer between the tank and mount. Will question Vans if this is acceptable to be left out if no clearance.