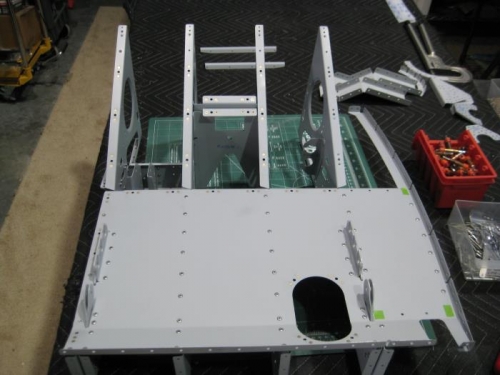
Brief Description: Assembled floor panels and installed to seat ribs
Completed steps 2-6 page 21iS/U-10 Step 2: Riveted nutplates to F-01225-L-1 and to F-01225-R-1 per the call-outs. Step 3: Separated F-1253 by removing the hatched areas shown in Figure 2. Step 4: Riveted F-01225-L-1 to #1 (except for the hole indicated) and the Flaperon Mixer Bracket/ Seat Rib Assembly using the rivets called out in Figure 3. Step 5: Riveted the nutplates shown to the Flaperon Mixer Bracket/ Seat Rib Assembly and to the F-01225-L Seat Floor using the rivets called out. Temporarily installed an 8-32 screw in the MS21051L08 nutplate to prevent misalignment while riveting. Step 6: Riveted F-1253-L (shown installed) to the bottom of the F-01225-L-1 using the rivets called out in Figure 3. Did not install a rivet in the aft most and forward most hole as indicated.
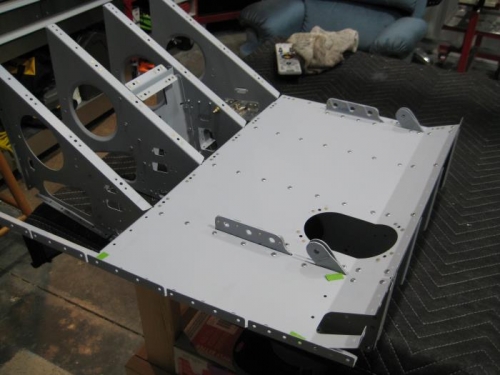
Completed steps 1-3 page 21iS/U-11 Step 1: Riveted F-01225-R-1 to #8 (except the hole indicated) and the Pulley Bracket/ Seat Rib Assembly using the rivets called out in Figure 1. Step 2: Riveted nutplates shown in Figure 1 to the Pulley Bracket/ Seat Rib Assembly and to F-01225-R-1 using the rivets called out. Again, temporarily installed an 8-32 screw in the MS21051L08 nutplate to prevent misalignment while riveting. Step 3: Using the rivets called out in Figure 1 riveted F-1253-R (shown installed) to the bottom of F-01225-R-1. Did not install a rivet in the aft most and forward most hole as indicated.