Brief Description: Attaching the Flaperon Mixer Bellcrank
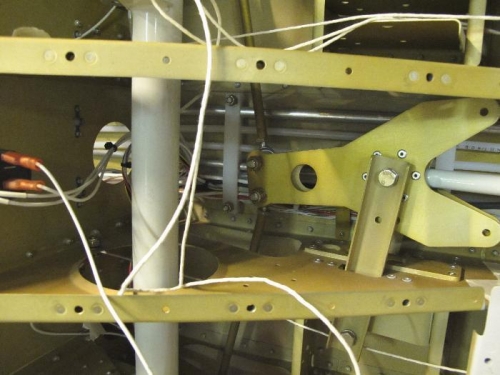
First step was to install the strip I had created to ensure the wires and tubes don't foul the Bellcrank Mixer Arm. See Picture 1. Just two rivets but quite difficult, as the rivets were pulled from under the bottom. I could not see whether the rivets were properly engaging with the strip. I was pleased with the result. No more worries about chafeing. With that done I could attach the Flaperon Mixer Bellcranks to the Flaperon Mixer Arms. Not easy to locate the washer and nut.
Next up was connecting the Control Sticks. The plans call for you to temporarily install the sticks at Section 31-11 Step 4. This doesn't tell you that there's reaming and trimming work to be done to accomplish this. This prep work isn't described until Section 32, and is critical to ensure there is minimal play in the control sticks. This seems a serious shortcoming in the plans. Don't ask me how I know ;-) As a result I may have a tiny bit of play that I could have avoided by reading ahead in the plans. We'll have to see whether it is noticeable.
Bolting the sticks needs the washers to be superglued to prevent them falling down through holes into inaccessible places. Again, don't ask me how I know ;-) I now cover up lightening holes underneath where I am securing bolts! Once the sticks are in place the previously prepared Control Stick Pushrod Assemblies can be bolted on to the sticks. More fiddly work with bolts and washers.
Finally the inboard ends of the Control Stick Pushrod Assemblies can be bolted to the Bellcrank. See Pictures 1 and 2.