Brief Description: Preparing for fibreglass fairing
No more excuses, it's time to attack the fibreglass.
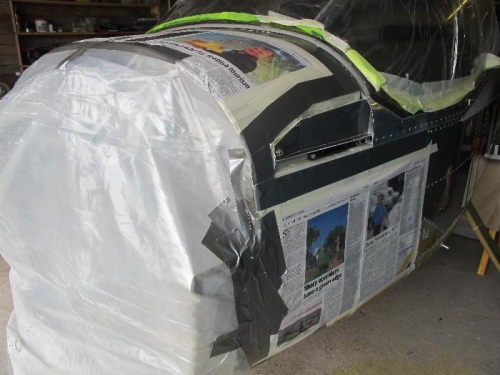
First step (Picture 1) was to delineate the fibreglass area with duck tape on the forward fuselage and electrical tape on the canopy. There's a paper template to identify which parts of the canopy will get covered with the fairing. Then I had to roughen the aluminium and the canopy with 80 grit sandpaper. Seemed sacrilege to deliberately "damage" the canopy. I masked off the rest of the front end of the fuselage to prevent epoxy drips going into unwelcome places. This included blankets inside the fuselage as there is currently a slot between the fuselage and the canopy - which the fairing will conceal! I didn't want drips running down the panel and into the "works".
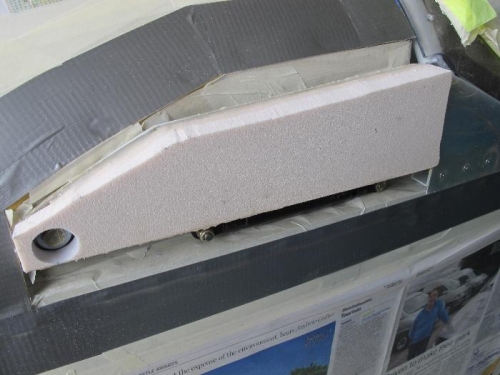
Picture 2 shows a block of foam which covers the canopy "arm". I drilled a 7/8 inch hole to expose the bolt and washer. In fact my unibit only goes up to 3/4 inch, so I had to open the hole with a file. The blocks are stuck on with epoxy.
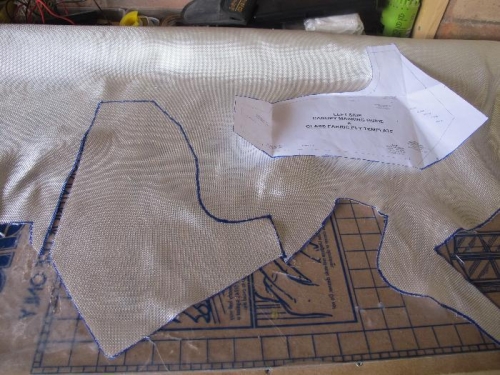
Picture 3 shows curtting fibreglass mat to the shapes and sizes on the template. There are five layers per side, all different.