
|

|
|
|
Keiths Web Site
|
Date: 3-8-2010
|
Number of Hours: 6.00
|
Manual Reference: P 32-10, Steps 5-9
|
Brief Description: Complete flaperon controls
|
|
Picking up from last week, my first job was to install the second brake tube, on the starboard leg. I was braver this time, and just bent the tube by hand. Seemed to work fine. Just need to hook up the loose ends coming aft from the brake pedals and I should have a complete circuit - but no way of knowing whether it leaks yet.
Following the wing install and the pilot drill holes, I had to open these up to 1/4 inch. To do this, I had to remove the Torque Arms, and do the match drilling on the bench. It was a pain removing the bolts, and more of a pain reinstalling them, this time crouched in the aft cockpit area with the rear fuselage supported on a trestle. First time I had actually been inside the cockpit.
Picture 1 shows the Flaperon Torque Tube finally connected to the Torque Arm. Picture 2 shows where the tube exits the fuselage. When the wings are installed, a tab on the flaperon is engaged in the slot between the two nylon blocks. Rotation of the tube causes the flaperon to move up/down.
Picture 3 shows the installation of a knob to facilitate movement of the fresh air vent. I got these from Avery Tools. They were designed for the RV10, but work fine here also. It was a bit fiddly removing, drilling, and reinstalling the various parts, especially as the nylon washers are easy to lose. Hope Francis doesn't view this as a "mod"!
|
|
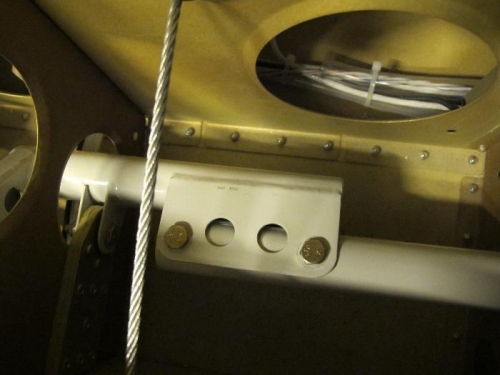
Torque Tube connected
|
|
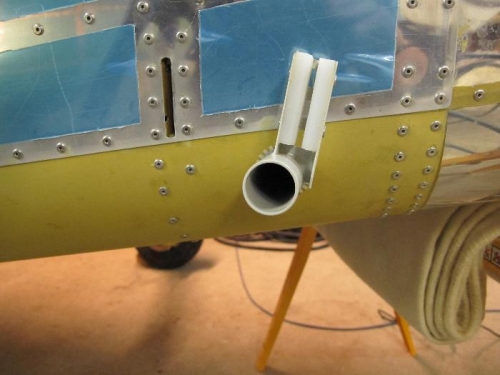
External view of the tube
|
|
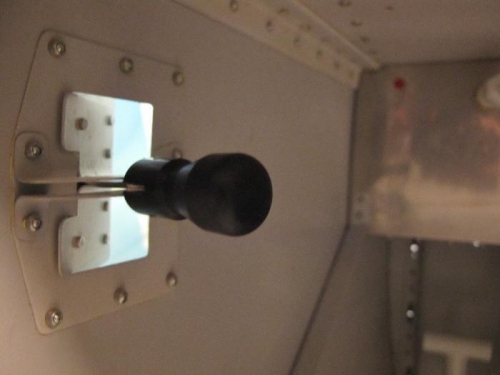
Aircon knob
|
|
|
|
|
|
|
|
|
Copyright © 2001-2024 Matronics. All Rights Reserved.
|