
|

|
|
|
Keiths Web Site
|
Date: 12-21-2009
|
Number of Hours: 5.00
|
Manual Reference:
|
Brief Description: Drill backup instrument holes
|
|
I spent a considerable amount of time trying to figure out how to install ASI, Altimeter, and Compass (all 2.25 inches) in the area above the map box, being one of two locations that Vans had issued a statement of "no objection".
The location needs to avoid the flanges of the instrument panel attach angles, the panel attach brackets, and the map box brackets. This was further complicated by the Precision Compass I had purchased that requires two access holes below the instrument for calibration.
The "best" solution seemed to be installing ASI, Compass, Altimeter from left to right with 0.5 inch spacing between the holes. I'll add a picture later. *See Picture 1*
Having worked out the geometry, Greg, a fellow builder (Zenair Zodiac) came along with some tools to help me get the instrument holes cut into the right hand panel. I had already purchased a 57mm hole cutter from Homebase (B&Q also have them, as do Screwfix I believe).
Using some scrap tailplane spar (remember that?) we tried the hole cutter, a fly cutter, and also a hole press. Given the thickness of the panels (60 thou?) the hole cutter seemed the best solution, and indeed worked fine.
Greg had a template which fits inside a 2.25 inch hole, to accurately drill the mounting screw holes, so we did this too. A trial fit of the ASI indicated success!
|
|
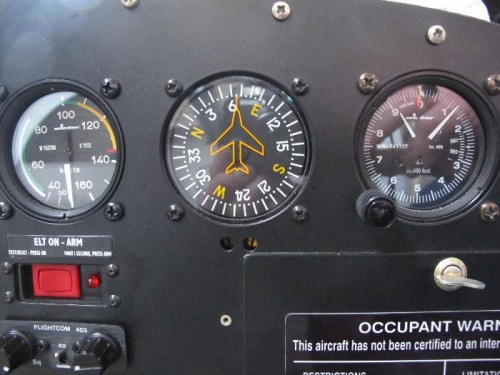
Backup instruments
|
|
|
|
|
|
|
|
|
Copyright © 2001-2024 Matronics. All Rights Reserved.
|