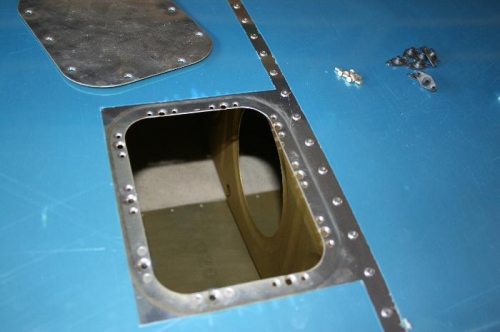
There's an inspection plate covering a hole that provides access to the stall warner. The plans call for the wing to be flipped upright to install the top skins, then flip again to install this access hatch in the bottom skin. No sense in flipping the wing twice as far as I can see, so I did this step after I had riveted the bottom skins.
I had previously dimpled and primed the door itself. The dimpling with the 1/8 inch dimpler was not deep enough for the screws to sit flush, so I had to invest in a #6 dimple die set. Boy, these are expensive! I redimpled the holes with the new die set and this should be fine now.
The remainder of this step is to dimple the skin around the hole to install 10 nutplates. There's just enough space do to this in-situ with the squeezers. The out-of-focus picture shows work in progress. A couple of nutplates are in, the rest to follow.
Work complete on the underside of the wing it's now time to turn it over. The instructions Page 17-03 Step 1 suggest 3 people are desirable to accomplish this to prevent the leading edges (which are hanging loose at this stage) from getting accidentally bent. I spend maybe 30 minutes putting in some clecoes (from the underside) so that the leading edge skins were at least partially secured. Not easy from underneath. We'll see whether the effort was worthwhile.