
|

|
|
|
GA Aerospace’s Web Site
|
Date: 4-21-2018
|
Number of Hours: 24.00
|
Manual Reference:
|
Brief Description: Page 15-05, 15-07, 16-04 and 18-07
|
|
Members: Daniel Martinez, Jose Guerrero, Ismael Romo
Abscent: 0
We started the day by looking at primed parts that were primed by Franklin yesterday so we could use them right away today, unluckily the primer didn’t adhere to the parts well enough so we had to prime them again later, we’ll get to that part in a moment.
We opened page 15-07 and even though we did not get a response from Van’s about the ribs that are noted as having three nutplates, we took the decision of installing them as we had them, only one nutplate (you can see figure 1 of page 16-04 and you’ll notice it only has 1 nutplate attached). With this decision we completed steps 4 to 6, completing page 15-07.
We then returned to page 15-05 to work on our left wing doing the same, placing the rib with only one nutplate completing steps 5 to 8 (15-05) but in step 8 when we dimpled 2 of the ribs, the body of the die was a bit too big and it made dents in the web of the ribs, we reported it and left it like that thinking that while it is not the best thing to have, it shouldn’t affect the wing structure. With this we completed page 15-05.
We skipped again to page 18-03 where we still need to complete the mirrored steps for our right flaperon. We did just that completing all the steps of page 18-03 being careful not to damage the skin as we did with our left flaperon, the technique used was clecloing the skin, since the pre-made holes on the skin are #40 or a bit smaller, instead of drilling #30 holes with the skin clecoed, we marked the holes with a #40 drill bit, removed the skin, drilled the holes with a stronger 1/8 drill bit to then finally expand the holes with a #30 drill bit, as well, with the unclecoed skin, we expanded these 13 holes with a #30 drill bit.
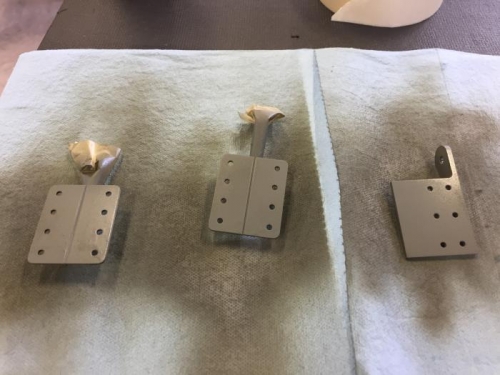
On page 18-04 we completed steps 2 through 7, (step 1 doesn’t need to be done again) and actually because our A-1208 Brackets and A-1207 Actuation brackets came with all drilled holes and pretty much ready for installation these steps were only done to make sure everything was ok.
|
|
|
|
|
|
|
|
|
|
|
|
|
|
|
Copyright © 2001-2024 Matronics. All Rights Reserved.
|