
|

|
|
|
GA Aerospace’s Web Site
|
Date: 3-14-2018
|
Number of Hours: 7.00
|
Manual Reference:
|
Brief Description: RWK and page 21 iS/ U-03
|
|
Team: Eduardo Duran, Andrea Limon, Magdalena Rios, Alma Elguezabal
Abscent:0
The rivet that was placed wrong in step 9 of page 21iS / U-03 was removed , with a pair of tweezers we cut the pin of the deformed head, with a drill # 40 the shank was removed and with a drill # 30 with guide finished breaking the rivet, finally with a rubber hammer and a pin was pushed the rest of the rivet that was in the hole..
Once the rivet was removed, a new one was placed correctly and the other parts were riveted following the same instructions as in this step.
Step 10 page 21iS / U-03: we made dimple # 30 and # 40 in the holes of piece F-01206A-1.
The drawing indicates holes that should not carry this dimple that are those of the ends in the piece, so we cover them with adhesive tape and # 30 we mark them with sharpie to avoid mistakes.
Step 11 page 21iS / U-03: we place 2 nutplates K1000-08D in piece F-01206A-1 with rivets AN426AD3-3.
Step 8 21iS / U-05: Part F-01219-1 has been separated into two pieces, calling them F-01219A-1 and B-1, after cutting them, we deburred the cut to eliminate roughness.
|
|
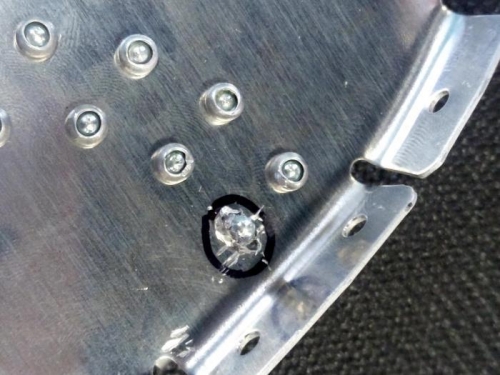
mistake's rivet pop to rwk
|
|
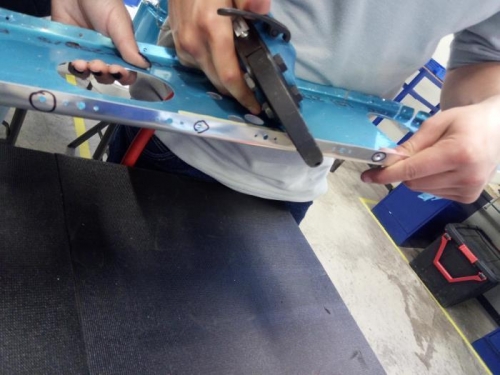
Dimpling to nutplates
|
|
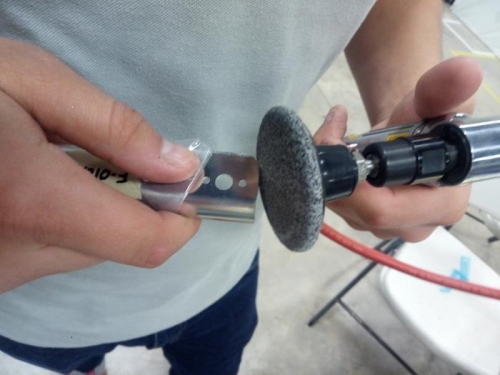
Deburring parts
|
|
|
|
|
|
|
|
|
Copyright © 2001-2024 Matronics. All Rights Reserved.
|