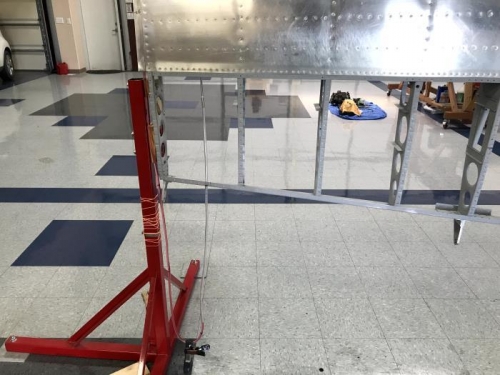
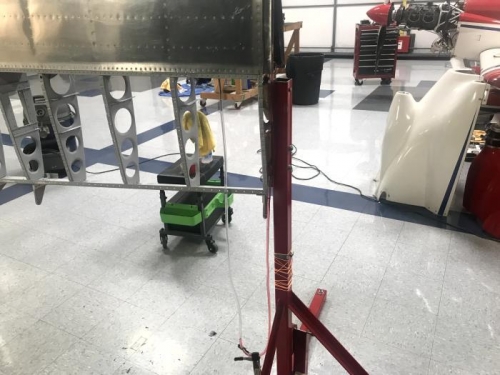
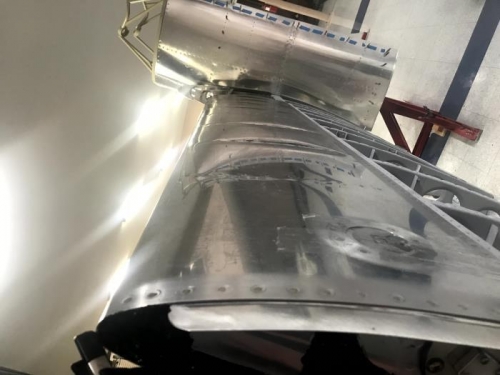
Moment of truth for all the fuel tank sealing work.... leak testing. I blocked off the fuel pick-up fitting and added a Schrader valve to the fuel drain fitting. Next a section of tubing was added to the fuel vent line and it was draped to the floor then up to the tip of the leading edge of the wing. This tubing was next filled with water that had some red food coloring in it for visibility. I want to pressurize the tank to 1 psi for the test. That equates to 27 inches of water, so the tubing had to allow enough room for that. It is very important not to over-pressurize the tank since it is very easy to burst with fairly low pressure. Therefore, the top of the tubing was set to allow the water to blow out if I put too much pressure in the tank. Image 1 shows the right tank under pressure with the red water at 27 inches differential. Image 2 is the right tank. Image 3 shows the slight, but scary bulging under pressure. Once under pressure, the tanks were sprayed with a soapy water mixture over all the rivets and seams. An interesting effect is that when you spray the whole skin, it cools down quite a bit (convective cooling) this makes the pressure inside the tank decrease making you think there is a leak. But after a few minutes, the manometer raises back up again. In the end, the tanks both held pressure, and no leaks were found with the soapy water solution. A major worry lifted!