
|

|
|
|
Harteveld, Chinook Plus 2
|
Date: 10-30-2016
|
Number of Hours: 11.00
|
Manual Reference: Steps 35, 36, and
|
Brief Description: Front Seat Window Frames and Floor
|
|
Crazy weekend. My eldest son tagged-along with my wife to a professional conference in Chicago, leaving my twelve-year-old daughter and I home for the past few days. In the midst of birthday parties, bat mitzvahs and a beautiful day soaring at Blairstown, we were able to bounce out to the shop for a couple of 2 and 3 hour blocks in the margins. Attacked steps 35, 36, and *almost* completed Step 37.
35 consists of assembling the Front Window Frames, the two bent tubes the create the windshield and give the plane that distinctive Chinook appearance. With these in place, I was able to rivet the front seat floor into place in Step 36. Step 37 involves attaching two uprights from the floor of the front seat to those Window Frames. These create structure as well as serving as the hinge-attach points to the eventual doors.
LOTS of custom riveting in these steps. Very different than the '3 bolts on to a huge assembly and now it looks more like an airplane' experience of recent weeks. Not a problem for me, since I really enjoy the custom shaping and riveting. But progress comes in slower, more deliberate chunks with this kind of work.
TWO EQUIPMENT NOTES;
- So glad I ponied-up the cash for the excellent Floria Pneumatic rivet puller as advised by Aeroplane Manufactory. It's an awesome tool.
- Spring Clamps are worth their weight in gold.
|
|
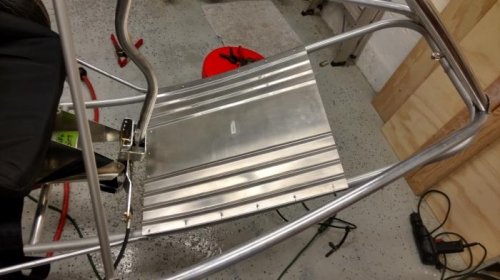
Front seat floor
|
|
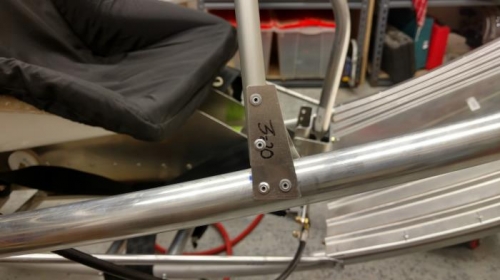
Front seat window frame gussets
|
|

Lolly engages the hun
|
|
|
|
|
|
|
|
|
Copyright © 2001-2024 Matronics. All Rights Reserved.
|