I got a somewhat early start today and began by cleaning up the shop. It needed a good sweeping and vacuuming, not to mention putting all of my tools away. I then went back to the right elevator. First I riveted the 2 plates on the spar with the nutplates. This is where the elevators will be attached to the horizontal stabilizer. I next riveted the counter balance skin and ribs. You have to be carfull to leave the holes open to attached to the spar later. Next came the rib and elevator horn. The upper part of the skin was now ready for the stiffeners to be attached. This is done by back-riveting on the bench over a steel plate. These rivets alway turn out looking great. The top of the skin is now riveted to the spar assembly. To do this, I had to set up a couple of 1 x 4's verticle on the bench. These were attached to the bench with clamps. I then clamped the top of the skin to the vertical supports and weighed down the bottom of the skin to the bench. The skin was now open about 90 degrees. I had to buck the rivet without seeing them. I did it by feel and checked the results after each rivet. Looks good! The bottom skin stiffeners were now riveted in place (again, back riveting). The counter balance assembly was next riveted to the spar. I turned the elevator upsidedown and weighed down the skins with some boards. I then blind riveted the bottom of the skin to spar. I did use solid rivets in about 10 spots that I could reach with the squeezer. After that, I finished riveting on the skin on the ribs and counter balance assembly. I left the last 3 rivets along the ribs off, for now, so I can work on the trailing edge a little easier. The only thing left to do on the right elevator is the trailing edge. I will assemble the left elevator first, so I can do both trailing edges and the rudder trailing edge at the same time. I put the right elevator on a table and pulled out the spar for the left elevator. Riveted upper skin, then top of skin to spar.....Long day!
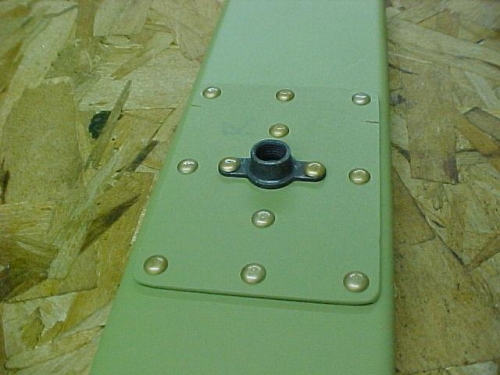
Nut plates and plates riveted to right elevator spar
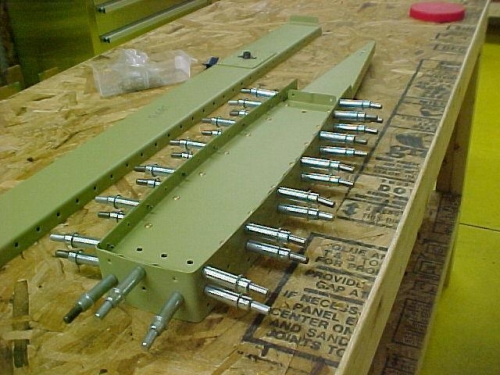
Right elevator counterbalance assembly clecoed and ready for rivets
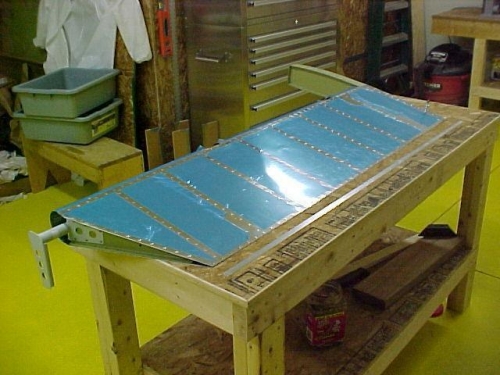
Completed right elevator (except for trailing edge)