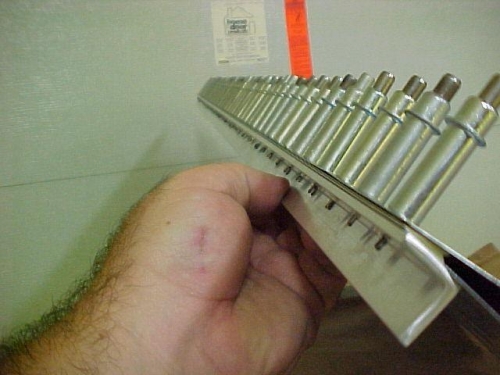
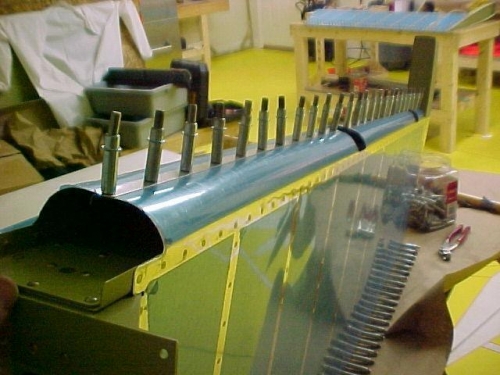
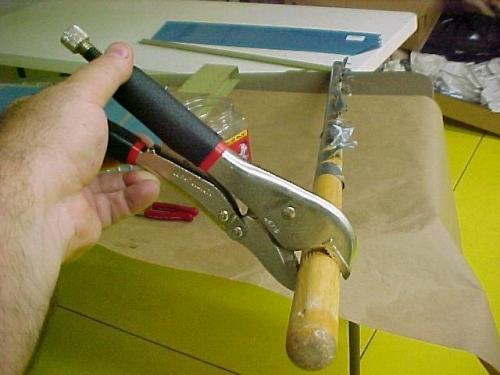
I cut the aluminum angle pieces for the rudder and left elevator trailing edges tonight. I then needed to match drill, so I used the AEX aluminum pieced as a guide in the drill press. I then clecoed the trailing edge to the aluminum angles. The edges are perfectly straight. All three trailing edges are now ready for the last step, which is to scuff up the bonding surfaces and clean the pieces in M.E.K. .....then it is pro-seal time. The new trim tab skin will be here on Friday, so I should be able to prep that and do all 4 pro-seal items on Saturday. I next decided to get the leading edge of the rudder finished. This is usually done after the riveting of the trailing edge, but I've got time to do it now and the order is not critical. I used a 1" diameter broom handle and taped it along the edge of the skin. This skin needs to be rolled to meet the rolled skin on the other side of the rudder. The two skins meet in the center and are riveted together to form a round leading edge. This edge is the pivot point of the connection between the rudder and vertical stabilizer. I connected a vise grip very tight on the end of the broom handle sticking out. I had Wendy roll the broom handle while I held the edge tight and away from the rudder spar. This form rolled the edges to nice curves. I then had to manipulate the metal a bit on the edges to get them to lay flat after I clecoed them together. After a bit of deburring of the holes I riveted the edges together with blind rivets. I must say, it looks pretty damn good! It is amazing how time flies when I'm in the shop working on this plane.......More Tomorrow.
The rubber trailing edge....looks good clecoed....I hope it is this straight when I rivet
The Leading edge of the rudder after roll-forming with the broom handle and clecoed