After a nice morning of sleeping in till almost 9:00 I got motivated and began by setting the clecoes in an even pattern in the top skins. I removed the bottom skins and set them on the storage shelf. I added more clecoed to the leading edges and guess what....I'm out of clecos again! I will order another 100 today. I placed the leading edges on the wing spar and clecoed the ribs to the spar. Next I clecoed the skins to the spar flange. This was a tight fit and the clecos had to be worked in. The next step was to add the W-919 doubler (or splice) strip. This seams to be a problem on a lot of builders web site. I had no problem with the instalation. Just remember to make the edge even all around and make sure the rib is in place before drilling. The next item was to deburr the tank stiffeners. I cut these to size last Friday. I clecoed them to the bottom of the tanks and match drilled. Next I found the Tank Attach Angles. These will attach the rear tank baffle to the main wing spar. I had to drill a hole in the center of each flange of eack attach angle. Van's provide drill guides for this. I then marked a line across the angle, through the one of the holes to line up with the holes in the tank baffle. I clecoed the attach angle on the baffle and drilled the remaining holes where the line went though the hole in the baffle. The hole on the other flange of each angle was drilled out to 3/16". This is where the tank will be bolted to the spar. I will definately need more clecoes, so I did place the order and will get them on Friday. A word of advice....If you are going to build BOTH wings at the same time (like I am doing), you will need DOUBLE the amount of 3/32 clecos Van's recommends. At least 550..... with this order, I should be OK.
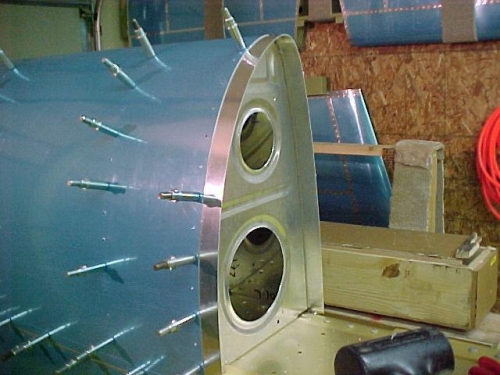
Splice strip installed in leading edge
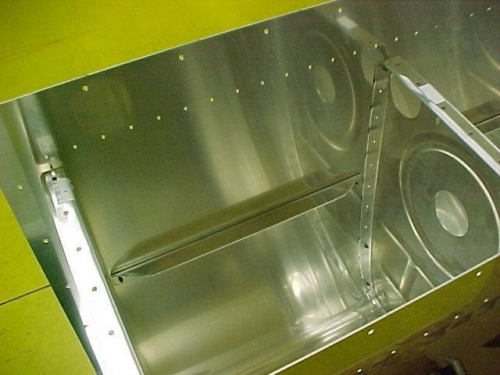
Tank stiffener (center of picture) attached to bottom of tank