
|

|
|
|
Building Juliette Whiskey
|
Date: 10-3-2006
|
Number of Hours: 3.50
|
Manual Reference: Section 7-3
|
Brief Description: Match drill spars/ribs & drill holes in ribs for c
|
|
I started tonite by finishing the match hole drilling in the spars/ribs. I deburred all the holes in the main spar, then the holes in the rear spar. I still have to do the holes in the ribs. but I decided to drill the 3/4" holes for the electrical conduit. I will use this conduit to run the wires from the base to the tip of the wings. This should accomodate wiring for the position lights, strobes, landing lights and hopefully the heated pitot wire. If I can't fit the heated pitot wires, I can use the tooling holes for a separate line. This one would not have conduit, but bushings at each hole. I got the hole location information from the Van's web site. Once I established the location on the first rib, I use an opposite rib to line up the next hole. I put 2 bolts in the tooling holes to line up the ribs, then drilled the next hole. I keeped doing this with each rib, till all 30 main ribs had a pilot hole drilled. I used the step drill in the drill press to enlarge the pilot holes to 3/4". Now all conduit holes match perfectly!I got another order from Van's today. 2 tie down rings/bolts (I should have ordered 3....I forgot about the tail tie down), A quart of pro-seal, 50 ft. of 3/4" nylon conduit, and two pre-made fuel tank pick-ups. I will finish the hole deburring tomorrow.
|
|
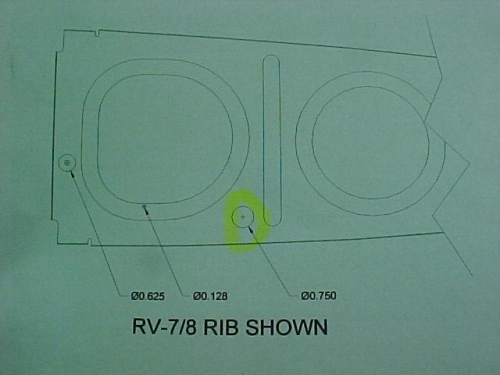
Location for conduit holes are published on Van's web site
|
|
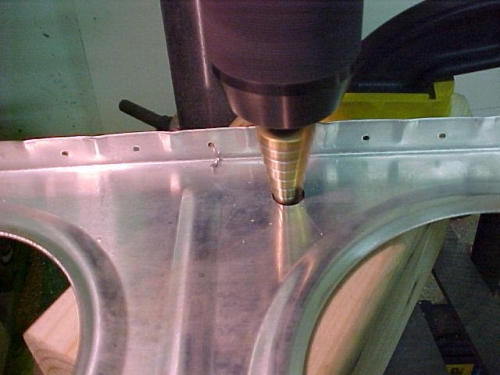
After drilling pilot hole, I used a step drill to ream out to 3/4"
|
|
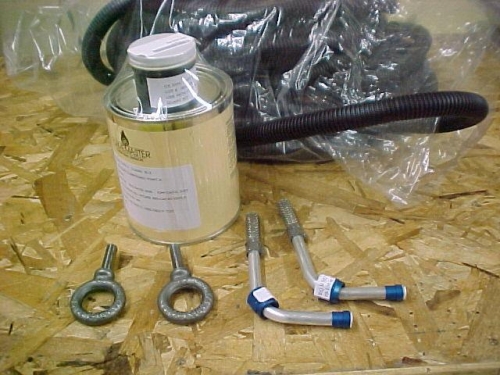
Delivery from Van's: Tie down bolts, Pro-seal, 50' nylon conduit, & 2 tank pick-ups
|
|
|
|
|
|
|
|
|
Copyright © 2001-2024 Matronics. All Rights Reserved.
|