The other 3/4 of the platenut connections went very smooth. The variable speed drill driver is the way to go on these. Very slow speed to start, and then when the majority of the countersunk is cut, increase the speed to smooth out the hole. Works great!. I then had to attached the platenuts for the access panels (three panels on each wing). There are also 2 platenuts attached to inboard web of each spar to connect the vertical bar (part of the wing connection to the fuselage). The plans called for 3/32 rivets on this, but the holes for the platenuts were larger (more like 1/8). The rivets just filled in the hole when bucked and barely held the platenut secure. I didn't think this would do, so I drilled them out and set it up for a 1/8 rivet. The larger rivet is still flush and holds better. I then tackled the tie down bars. I cut the bars down to size, deburred and then tapped one end with a 3/8 tap. I set the first hole and used the spar holes as template for the others, then drilled. I then bolted the bar to the spar. Here is where I ran into trouble. I used my new torque wrench for the first time. I set it for 20 in/lbs and tightened. The damn thing does not work, because I ended up shearing the bolt in half! I was pissed! I ended up having to replace a couple of bolts and redoing one of the platenuts. I will have to order these from Van's on Monday. I fixed to problem and did the tie down bar on the other spar with no problem. I will have to go back and torque these connections when I get a new torque wrench (I'm taking this one back). The two main spars are now prepped. All left is to prime the countersunk holes. I will do that when I prime the rear spars this week.
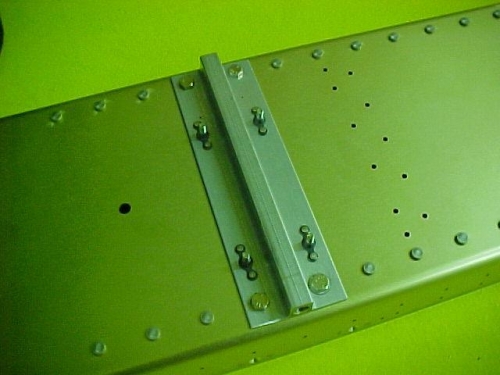
Tie down bar installed. Note the platenuts holding the bellcrank brackets on the other side.