
|

|
|
|
Building Juliette Whiskey
|
Date: 2-5-2009
|
Number of Hours: 7.00
|
Manual Reference:
|
Brief Description: Rails, Seats, Steps....
|
|
Fun Stuff Today! I began by riveting the side rails and canopy decks. I've seen in other's builder's log using a back rivet plate to buck these rivets, but I just used my Tungsten bucking bar and it worked very well. Next, I cleaned and primed the area the steps will attached to on the fuselage. I have the option of using pop rivets for the steps, but I will use solid rivets. I also noticed in another builder's log that if you have a tip-up canopy, you will have a problem with 3 top skin rivets at the seat back bulkhead. This is why some builders opt to not rivet the assembly until the top skin is riveted.....Well I read this last night...after I had riveted the assembly together yesterday. This is not a problem if you are doing a sliding canopy, but the tip up has a thick angle that will not allow access with a bucking bar behind these 3 rivet (3 on each side). I will end up using pop rivets. I can fill the holes and when the plane is painted, you will never know they are not solid rivets (it's only six rivets out of 10,000 or so). Next I worked on the baggage floors. I riveted the platenuts and installed the access panels with the Stainless Steel button screws I bought awhile back. I will probably need to order some more of these, but they look great and don't have as high a profile as the Van's supplied brass screws. Next I backriveted the hinge halves on the seat bottoms. These get round headed rivets, so I was a little concerned on how they would turn out after backriveting. The round heads ended up with a small flat area...they look fine. Finally I worked on the seat back assemblies. After riveing these together, they become very rigid and very light. I cut the hinge pins to length and set the assemblies aside.
I'm getting to point where I will be able to climb into the fuselage for the first time, sit in the seats and make airplane noises!! I can't wait!!
|
|

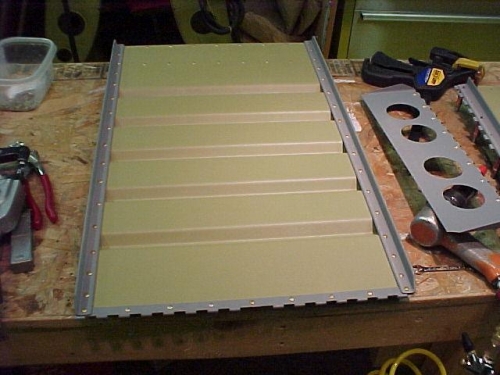
The side rails and decks are riveted!
|
|
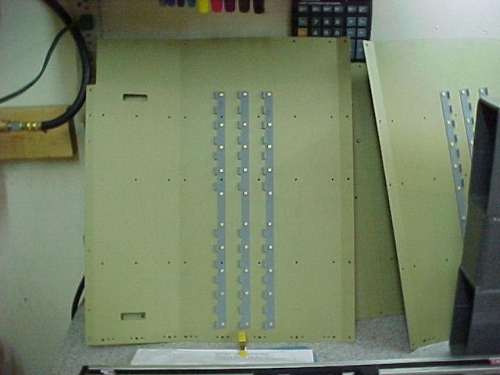
The seat back assembly is done.
|
|
The seat bottom showing the riveted hinges (3 for seat adjustments)
|
|
|
|
|
|
|
|
|
Copyright © 2001-2024 Matronics. All Rights Reserved.
|