Brief Description: D-1015 Nose Gear Link Collar Assembly onto the sha
SECTION 46-07 Engine Mounting and Landing Gear
Oct 1st, 2010
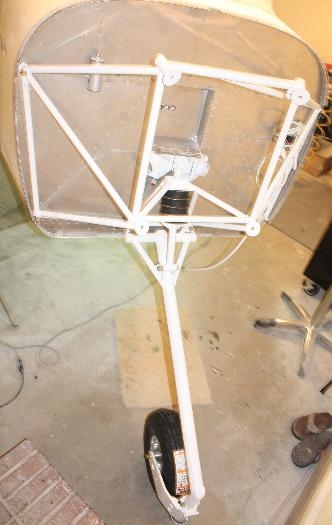
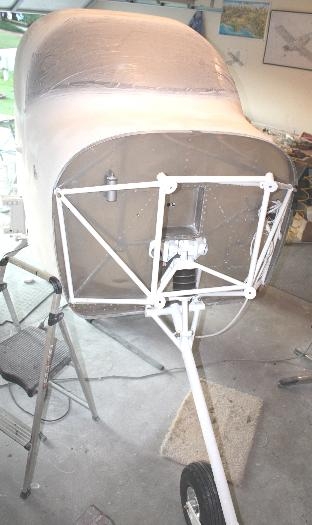
Step 1, …I located the freshly painted U-1002 Isolator Washer and the WD-1015 Nose Gear Link Collar Assembly onto the shaft of the WD-1016 Nose Gear Link Assembly and install with a AN5-16A bolt, AN960-516 washer and MS21045-5 nut and torque to 140 inch pounds. However I will have to wait until I can buy something to compress the Nose Gear Elastomers so that the WD-1015 Nose Gear Link Collar will fit and I can install the AN5 bolt. Step 2, … I have to order two more AN822-4D Pipe Elbows that are needed for the installation of the Left and Right Disk Brake Cylinder Assemblies. As I believe I used the ones supplied with the Fuselage kit on the optional Emergency Brake upgrade. However, I needed to remove and swap one of the Bleeder Valves on the Right Side and place on the opposite end. And I tightened both Bleeder Valves. Step 3, … Slide both the Disk Brake Cylinder Assemblies one at a time onto the Wheel Assembly Torque Plate. I accomplished this by removing the bolts holding Back Plate behind the Brake Disk and then bolt the Back Plate and the Disk Cylinder Assembly together. I then spun the tire to check the fit. Step 4, …. I purchased a set of custom brake lines from Bonco in LA for $30.00 each. This is because on the RV 7A some pilots have been experiencing the aluminum brake lines splitting after 150 to 500 hours as eh landing gear flexes repeatability. So I tightened the Bonco Stainless Steel brake lines with clear protective coating around the AN837-4D fitting that runs out of the fuselage to 70 in/lbs. I am waiting to attach the other end to the Disk Brake Cylinder Assemblies until I receive the AN822-4D Pipe Elbows. Step 5 .. I don’t do this because the Bonco Stainless Steel brake lines are flexible. Step 6 .. Secured the brake lines with friction tape.
Time about 4 hours working slow and carefully again.
Need to Compress Nose Gear Elastomers to Bolt the Nose Gear Link Collar Assembly in Place