
|

|
|
|
Conrads X-10 Build Log
|
Date: 4-2-2010
|
Number of Hours: 16.00
|
Manual Reference: 43-10 Steps 1 to 1
|
Brief Description: SECTION 43 CABIN COVER Page 43-10 Steps 1 to 10
|
|
SECTION 43 CABIN COVER Page 43-10 Steps 1 to 10
Step 1, I clamped the F-10107 Rivet Backup Strips to the sides of the mid side skin flanges so that eh bottom of the strops are even with the bottom fiberglass flanges.
Step 2, Match-drill #30 the holes in the Mid Side Skin Flanges into the F-10107 Rivet Backup Strips then remove and debur the strips.
Step 3, After deburring the strips dimple the #30 holes along the top edge of both F-1070 Mid Side Skins and then the forward edge of the F-1074 Tailcone Fwd Top Skin that are in common to the C-1001 Cabin Cover Flanges. Machine counter sink the holes in the Cabin Cover flanges for the created dimples in the skin.
I riveted the top Instrument Sub-Panel Top to the main fuselage.
Step 4, I riveted the F-1042F Gussets to the F-1042 Bulkhead Side Channels with AN470AD4-5 rivets.
Step 5, After sanding and smoothening and then painting with white DTM primers. I placed the Cabin Crew Cover back on for the final time
Step 6, I clecoed the F-10107 Rivet Backup Strips and the sides of the C-1001 Cabin Cover to the F-1070 Mid Side Skins See figure 4.
Step 7, I temp removed the four bolts witch splice together the two sets of F-1032 and the F-1046 longerons.
Step 8, I did apply a small bead of tank sealant to the tailcone Fwd Top Skin Flanges.
Step 9, Then clecoed the F-1074 Tailcone Fwd Top Skin to the tailcone and with the remaining rivet backup strip to the C-1001 Cabin Cover. Insuring that the shim I created previously was found from page 32-4 step 1.
Step 10, I riveted the F-1070 Mid Side Skins the C-1001 Cabin Cover and the F-10107 Rivet Backup Strips using the CS4-4 pop rivets.
Time about 16 hours. Because of the extra time required for riveting the Upper Fwd Fuselage Sub-Assembly to Fwd Fuselage from page 41-6.
|
|

Fwd Fuselage Sub-Assembly (Top) to the Fwd Fuselage (Bottom) with Soundproofing Materail Installed
|
|
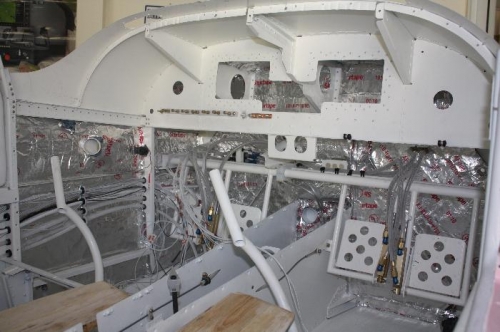
Right Side Picture
|
|
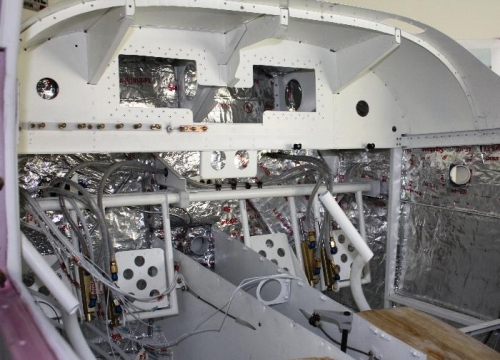
Another View of the Insulation Installed
|
|
|
|
|
|
|
|
|
Copyright © 2001-2024 Matronics. All Rights Reserved.
|