
|

|
|
|
Conrads X-10 Build Log
|
Date: 11-21-2009
|
Number of Hours: 2.00
|
Manual Reference: 33 -9 Steps 1 to 8
|
Brief Description: Section 33 BAGGAGE AREA … Page 33 -9 Steps 1 to 8
|
|
Section 33 BAGGAGE AREA … Page 33 -9 Steps 1 to 8
Step 1, I Match-Drilled #30 the holes in the bottom flange of the right baggage cover in to the floor of the F-1022A-R. Then further Match-Drilled the F-1013-R Fwd Fuse Longeron.
Step 2, similar to step 1.
Step 3, Final-Drilled #40- the nutplate attachment rivet holes common to the F-1080 Right Baggage Cover and the F-1034C-R Fuselage Bulkhead.
Step 4, I cleoed the F-1006E Upper Baggage Bulkhead Corrugation to the F-1006F Lower Baggage Bulkhead Corrugation. Match-Drill #19 the holes of the upper baggage bulkhead corrugation into the F-1006A, C and D bulkheads.
Step 5, I removed the F-1006E and F Baggage Bulkhead Corrugations and the F-1074 Tail Cone Forward Top Skin.
Step 6, As shown in figure 3 I cleoed the #19 holes in the aft flange of the F-1080 Right Baggage Cover. The match-Drilled the #30 three remaining holes in the aft flange of the F-1006C Bulkhead.
Step 7, Match-Drilled #40 the nutplate attachment rivet holes for the four nutplates into the F-1006C Bulkhead and into the F-1080 Right Baggage Cover.
Step 8, Now I removed the F-1080 Right Baggage Cover and deburred all the holes in the cover and there corresponding holes. And then removed the Aldine coating with Scotch-Brite, wiped with acetone and primed with DTM Primer.
I need to install thermal and sound insulation but I have the items on back order so I need to wait until next week to complete steps 9 to 11.
Time about 2 hours.
|
|
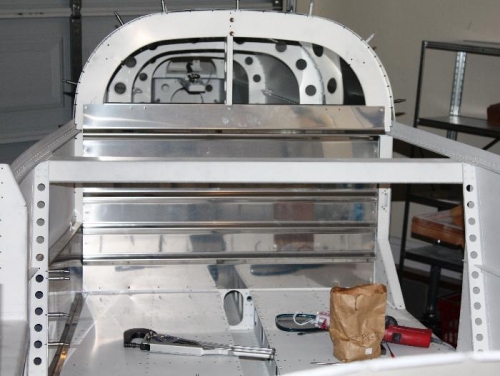
F-1006E Upper Baggage Bulkhead Corrugation
|
|
|
|
|
|
|
|
|
Copyright © 2001-2024 Matronics. All Rights Reserved.
|