
|

|
|
|
Conrads X-10 Build Log
|
Date: 9-13-2009
|
Number of Hours: 3.00
|
Manual Reference: 28-17 step 1 & 2
|
Brief Description: Section 28, FWD FUSELAGE RIBS, BHDS, BOTTOM SKINS
|
|
Section 28, FWD FUSELAGE RIBS, BHDS, BOTTOM SKINS … Page 28-17, steps 1 and 2
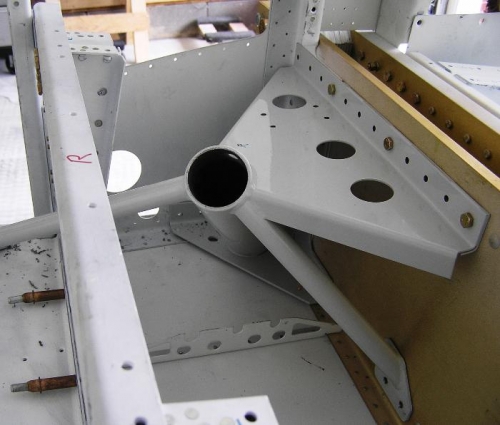
Step 1, First I installed the Co-pilot and Pilots Floor Panels. Then I marked a line along the existing holes to fine the center-line, as shown in figure 1, drilling the Landing Gear Mount. Then I temp installed the Landing Gear Mount with AN3-14A and AN3-15A bolts. Then I inserted the WD-1021P Shims that I previously designed. After scribing an intersection of lines I pilot drilled with a #30 drill the foot of the Fwd Brace Mount Plate, Fwd Cabin Floor Panel and the F-1049C Fwd Fuselage Floor Rib as shown in figure1.
Step 2, I then reamed out the #30 holes previously created in Step 1 with a #12 drill bit. The after applying the F-1050 Fwd Floor Panel Side Skin I Match Drilled #30 then Final Drilled with #12 the F-1004K Center Section Side Plate, WD-1021P Shim and the WD-1021L Landing Gear Mount as shown in figure 2.
Page 28-18, I match drilled $30 the four nutplates riveted holes of the F-1049C Fwd Floor Ribs as shown in figure 1 the using a AN3 bolt I #40 drilled the Match Drill nutplate holes. The dimpled the #40 holes and then riveted the K1000-3 nutplates into place.
|
|
Step 1
|
|
|
|
|
|
|
|
|
Copyright © 2001-2024 Matronics. All Rights Reserved.
|