
|

|
|
|
Conrads X-10 Build Log
|
Date: 6-3-2009
|
Number of Hours: 4.00
|
Manual Reference: 23-5, Steps 1 to 4
|
Brief Description: FORWARD TORQUE TUBE SUB-ASSEMBLY and AFT TORQUE TU
|
|
6/3/2009 …Section 23-5, Steps 1 to 4. Step 1, FORWARD TORQUE TUBE SUB-ASSEMBLY, I inserted the VA-162 Push Rod End into the Long end of the two WD-1014 Aileron Torque Tubes and then Match Drilled with a #30 drill the holes, removed the Push Rod Ends and deburred the holes. Step 2, AFT TORQUE TUBE SUBASSEMBLY, this is a repeat to step 1 but insert the VA-162 Push Rod Ends into the SHORT ends of the Aileron Torque Tubes. Step 4, MATCH DRILL TORQUE TUBE COLLAR, I inserted the previously made WD-1014 FORWARD Torque Tube Sub-assembly to the Torque Tube Collars WD-1014C by only 1 -1 /2 inches as shown in figure 3. Then I Match drilled the toque tube collar using the holes of the torque tub sub-assembly using a #30 drill. I then Final drilled the holes with a number 12 drill bit. Step 4, TORQUE TUBE COLLAR BOLT INSTALLATION, I deburred all the #12 holes in order to prepare for the installation of four AN3-13A bolts, AN960-10 washers and AN365-1032 lock nuts. Then I primed with DTS primer all of the sub-assemblies including the insides. Total Time about 4 hours.
|
|
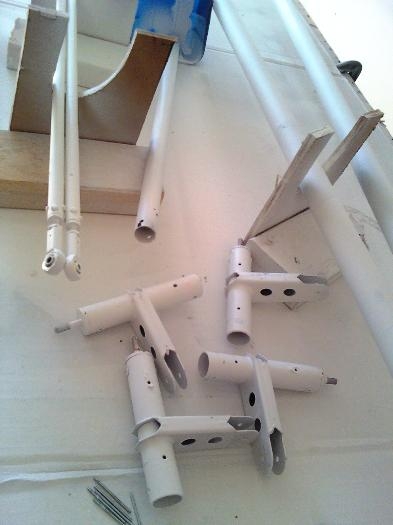
Torque Tubes, Push Tubes and Bell Crank Tubes being primed
|
|
|
|
|
|
|
|
|
Copyright © 2001-2024 Matronics. All Rights Reserved.
|