Brief Description: Section 36 BRAKE LINE Page 36-3 Steps 1 to 6
Section 36 BRAKE LINE Page 36-3 Steps 1 to 6
Step 1, I already accomplished this step of removing the vent assembly.
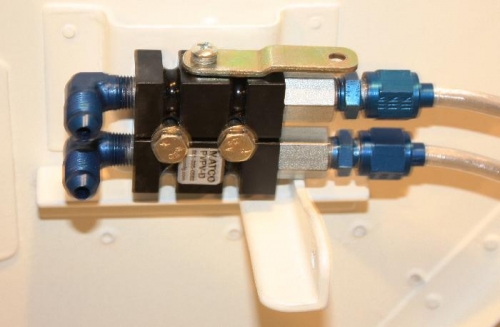
Step 2, OPTION I ADDED. I located and installed the AN833-4D Elbows, and AN855 Nipples to the Matco Park Valve assembly, that I will attach a push-pull cable to control the application of the hydraulic pressure (off-on).
Step 3, I created the brake lines as in the previous page omitting the snap bushing.
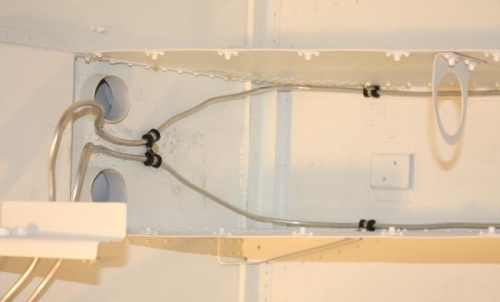
Step 4, Added 4 MS21919DG4 Cushion Clamps or Adel clamps that will hole the tubing in place in the tunnel.
Step 5, I flared both ends after adding two AN818-4D nuts and AN819-4D sleeves to each piece of tubing.
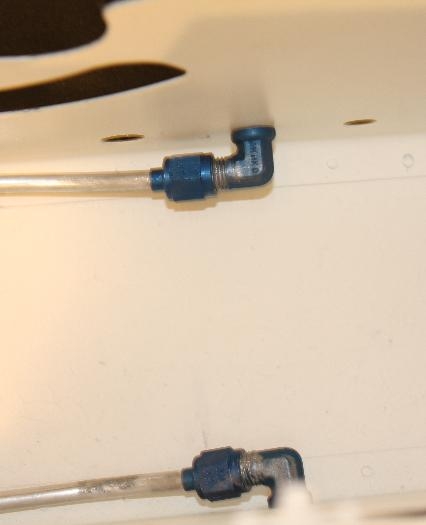
Step 6, Added the brake line fitting to the aft end F-1048 Fwd Fuselage Ribs and to the AN855 Nipples to the Matco Park Valve assembly. Then using AN515-8R screws secured the tubing with the clamps.
Time about 1 hour.
Matco Park Valve assembly
F-1048 Fwd Fuselage Ribs and to the AN855 Nipples
Looking in the tunnel before final tweeking of the line placement