Section 35 ACCESS COVERS and FLOOR PANELS Page 35-2 Steps 1 to 5
Step 1, After locating and deburring the edges of the F-1016C-L/R Floor Pans I carefully placed into the foot well forcing the F-1016-L/R and F-1016F-L/R Inboard and Outboard Foot Well Ribs apart slightly. Then after clecoing in place I Final drilled #30 the holes in common between the F-1005A rear Spar Bulkhead and the Floor Pan. And Match Drilled the Forward Flanges of the Floor Pan into the F-1004B Center Bulkhead on both pans.
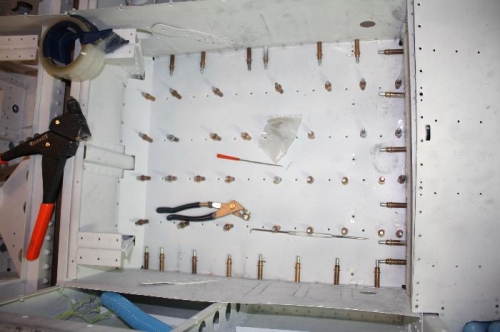
Step 2, I Final Drilled the #19 screw holes for a #8 screws and Final Drilled #40 the nutplate attachment holes. Then I Final drilled all the #30 holes in the bottom of the Floor Pan.
Step 3, I removed the Floor Pan, Deburred the holes and dimpled all the #30 Bottom Floor Pan holes and the #19 screw holes and nutplate attachment holes. After this I removed the Aldine and cleaned with Acetone and primed with DTM primer.
Step 4, I riveted the K1100-08 nutplates to the bottom side of the Floor Pan with AN426AD3-3.5 rivets.
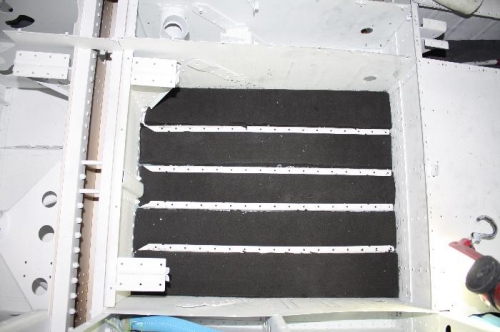
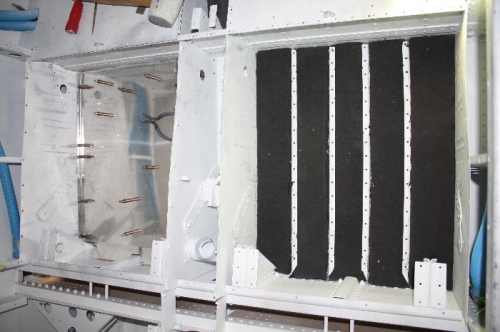
Step 5, I inserted my custom sandwich style ½ inch of double insulated heat foil glued to ½ inch super sound proofing material between the F1016-R/L ribs in the bottom of the pan. Now satisfied with the previous steps, I carefully and slowly inserted the Floor Pan and riveted with AN470AD4-4 rivets along the sides and CS4-4 rivets pop riveted to the bottom of, the pan.