Brief Description: Bolting Dyna-1 Engine Mount to Firewall Assembly
SECTION 46-02 SECTION 46-02 Engine Mounting and Landing Gear and Landing Gear
Sept 24th
I was glad to be done with the Cabin Doors and Transparencies as this took over 2 months (all Summer 2010) to complete correctly and move on.
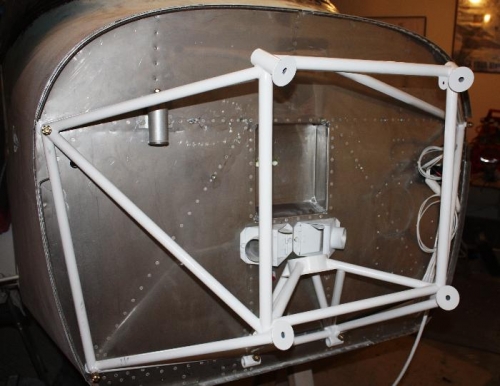
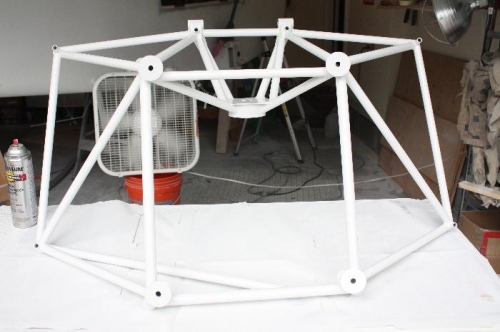
Step 1 .. After final painting with a quality paint I drilled to 3/8” one of the top holes in the Firewall Assembly. I did this by increasing the drill bit size from 3/16” to 3/8”. Then I placed an AN6-24 bolt into the upper left 3/8” hole. After bolting the Dyna-1 Engine Mount WD-1001-D1 to the Firewall I pulled over the frame for perfect alignment and drilled another 3/8” hole in the upper right. Then I deburred the hole with a circular file. Then added the AN6-24 bolt, An960-616 washers and AN310-6 nut and continued to drill out and deburr the four bottom holes to 3/8”. Final I torqued all six AN310-6 castle nuts and secured with MS24665-283 cotter pins.
Step 2.. This deburring process was combined in step 1.
$$$$$$$$$$ => Now comes the new $$$ Lycoming IO-540 to attach tothe Dy-1 Engine Mount.
Time about 1.5 hours because I was working and kept taking breaks.