
|

|
|
|
Serenity
|
Date: 1-5-2008
|
Number of Hours: 6.00
|
Manual Reference:
|
Brief Description: Center Fuselage - start
|
|
Since I can't do much more with the aft fuse until the ordered replacement skin arrives, I started the center fuselage. First step was to make some spacers and baggage corner rib attachement pieces (pic 1). Next, 4 of the center seat ribs need the lightening hole elongated for control column push tube clearance. Now, the plans say to do 2 ribs, but the drawings show four - after checking with various builders' sites, and knowing that the push tube assemble spans inside of 4 ribs, I did 4. Fly cutter on drill press (see pic 2 - use tooling hole for alignment), then trimmed away the rest with snips. In addition, the two most center ribs need to have the top cut away with a bolted bridge made, so if one needs to remove the push tube assembly, it is possible. Chad Jensen did all 4 ribs with removeable tops, which makes it much easier to remove the control assembly in toto and not screw around with the hard to reach washers required. However, the probability of needing to remove this after the plane is flying is practically nil, so I elected to just two the two ribs Van's recommends. Pic for this is on the next day's entry, as Kitlog doesn't allow for mroe than 3 pics/day.
|
|

|
|

|
|
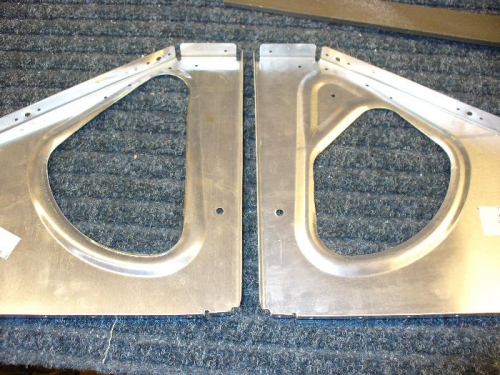
Four center ribs as per left, rest as per the one on the right.
|
|
|
|
|
|
|
|
|
Copyright © 2001-2024 Matronics. All Rights Reserved.
|